Welcome To The Shakin 'N Bakin Blog!

Welcome to my blog! I love to cook and bake for my family. I hope you enjoy the recipes, foodie reviews, foodie giveaways and cooking tips posted on my blog.

How to Print Recipes: You can print out each individual recipe featured on this blog by clicking the "share" button at the bottom of each post. It will open up to show you options, click on print and another window will open up with the recipe inside it for printing. You can also use the SHARE button to email a copy of the recipe to yourself for printing later.

Showing posts with label Pie Recipes. Show all posts

Monday, January 25, 2016

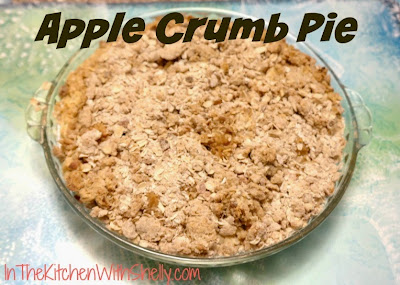
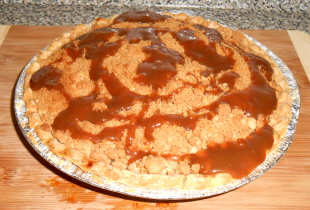
Easy Apple Crumb Pie Recipe

When it comes to pie making, I love making a good crumb topping for my fruit pies like cherry, blueberry and apple pies. While I do enjoy a double crust pie from time to time...a crumb topping is always my favorite.

A few weeks ago I was experimenting in my kitchen and came up with a unique apple pie crumbing topping that is out of this world...delicious! Here is how I made it.

Easy Crumb Topping Recipe for Apple Pie

1 pre-made or homemade pie crust 9" or 10"
1 large can apple pie filling or make your own

Crumb Topping Ingredients:

3 packets of Instant Oatmeal Apple & Cinnamon flavor
2 packets of Instant Oatmeal Cinnamon & Spice flavor
3-4 tablespoons butter, melted
1/4 cup all-purpose flour

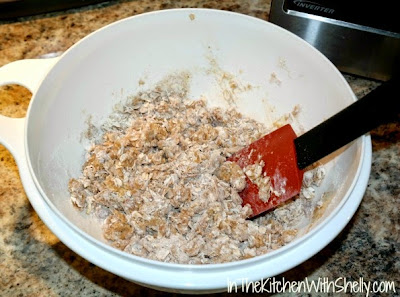
Melt butter in the microwave. In a medium sized mixing bowl toss together the oatmeal and all-purpose flour until combined. Using a rubber spatula stir in the melted butter until mixture is crumbly. You made need to add a little more butter, depending on if you are making a 9" or 10" apple pie.

Sprinkle the crumb topping over your prepared apple pie until filling is evenly covered. Place pie into a preheated 350 degree oven and bake for 15-18 minutes. Note: I check my pies at the 12 minute mark and then judge it from there. Remove from oven and let cool.

Friday, February 27, 2015

How to Make Puff Pastry from Scratch + Recipe

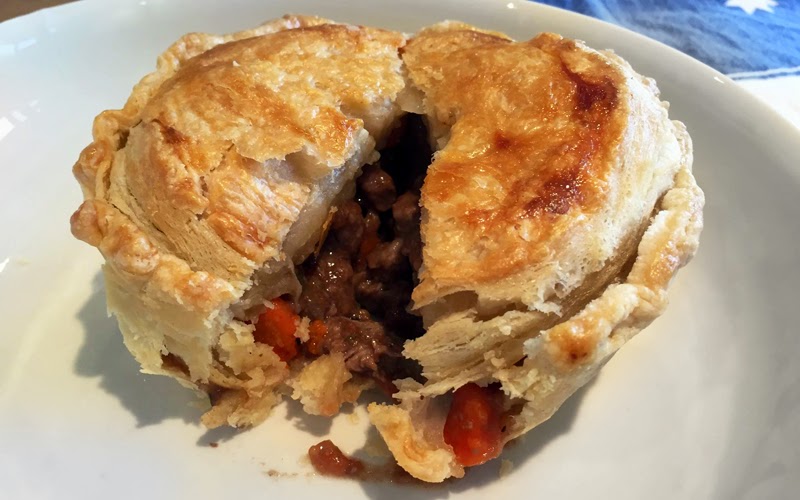
Whether you’re looking to cook up a decadent breakfast pastry, crowd-pleasing Piggies in a Blanket, or an Australian Meat Pie, this homemade light, buttery, flakey, layered goodness is worth all five steps.

Courtesy of: Maria Rodale, CEO of Rodale Inc., organic activist, food blogger & mom of three. As Maria says on her blog, “I am not a pastry chef. I’m a hungry woman who is fundamentally lazy, even though I’m crazy enough to make puff pastry from scratch… this recipe may not be perfect, but it will be perfectly delicious.” You can check out the Original Puff Pastry blog post from Maria's blog.


How to Make Puff Pastry from Scratch + Recipe

4 Tablespoons unsalted butter, cubed
2 cups all-purpose flour, chilled (plus a little more for dusting)
1½ teaspoons salt
1½ teaspoons cider vinegar
¾ cup water, chilled
16 Tablespoons unsalted butter, chilled

WARNING: Puff pastry needs at least 24 hours of advance work. Other than that, it’s not too hard.

Part one:

Mix the flour and salt in a bowl and toss in the butter, which should be softened slightly. Mix together gently with your fingers. Add the vinegar to the water; add the vinegar-water to the dough and mix it together. Put it out on the counter (with some flour to dust) and gently knead to make the dough smooth. Flatten the dough into a round flat ball and wrap it in plastic then put it in the fridge for 20 minutes.

Part two:

Take the 16 tablespoons of butter out of the fridge and let it soften a bit. Get out some parchment paper and roll out the butter between the sheets to a half-inch-thick 4-inch square (or so). Get the pastry out and roll it out on a lightly floured surface to make a 4 x 8? rectangle. Put the butter at one end and fold it over to cover it. It’s like you are making/wrapping a butter present!

Part three:

Now the fun begins (the making a book part). Roll the dough out in a long 4 x 18? sheet. Fold both ends in toward the center as if you are making a “gatefold.” (I found that a spatula helps if it gets stuck.) And then fold it again so you have a “book.” Wrap it up in plastic and then put it in the fridge. Wait 30 minutes and then do it again, making sure that the “spine” of the book is always on the left (that’s how you know you are rotating properly). Now go to bed. Or whatever. Wait “24 hours,” give or take.

Part four:

Do this whole rolling, folding, and wrapping thing two more times (waiting 30 minutes between each). Let the dough warm up a tiny bit after you take it out from the long refrigerator rest. Refrigerate for 30 minutes before doing the final rolling and cutting for your pie lids.
Part five:

Roll out for the final time. Be gentle when you cut…don’t want to smoosh all those lovely layers! Make the lid slightly larger than your pie top because it might shrink a bit when you cook it. Use the egg wash (1 raw beaten egg and a bit of water) to glue it together and polish the top.

Friday, October 24, 2014

Sweet Potato Custard Pie Recipe

With cooler nights upon us, Fall is definitely here with many more months to come. As farmer's markets and grocery stores stock up with seasonal produce, comfort foods tend to be on the mind. Allen Dikker, the owner and creator of the all-potato concept restaurant, Potatopia, is well versed in comfort foods, and has created a delicious Sweet Potato Custard Pie recipe for all of us to enjoy! Perfect for all of our family holiday meals.

This recipe will make approximately 8 servings. Cook time: 1 hour.


Allen Dikker of Potatopia's Sweet Potato Custard Pie

1 cup mashed, cooked sweet potato
1-1/2 cups sugar
1-2/3 cups milk
3 eggs
1/2 teaspoon salt
1/8 teaspoon ground ginger
1 teaspoon grated fresh orange rind
1 unbaked 9-inch pastry shell

Preheat oven to 350 degrees F. Mix sugar, milk, eggs, salt, ginger, and orange rind into cooked sweet potato. Turn into unbaked pastry shell and bake for 1 hour or until knife inserted in center comes out clean. (If desired, serve warm with 1 cup of heavy cream whipped with 1/4 cup brandy.)

Friday, November 29, 2013

Pillsbury Makes Our Holiday Meals Delicious and Easier!

During the holiday season I do a lot of baking! I bake for my own family, my daughter's family and I am always baking up some tasty treats to take into the local nursing home where my great auntie lives. If I had even more time, I would do even more baking since baking is what I love to do! While I enjoy cooking...baking is my thing!

When I need to cut down time in the kitchen (especially around the holidays) I like to pick up a few Pillsbury staples to keep on hand. I like to keep the Pillsbury Cinnabon Rolls, Grands Biscuits, Pizza Crust and Pie Crusts on hand at all times...especially right now!

For Thanksgiving breakfast we wanted to keep it simple so I whipped up an egg casserole for breakfast and served the yummy Cinnabon rolls alongside it. Everyone gobbled them down in rapid fashion. I love that I just break open the can, place them on a baking sheet, bake them for a few minutes and then drizzle them with the included icing. Wow, what a huge time saver and they are super delicious!

With our Thanksgiving meal yesterday I served the Grands Biscuits with some melted honey butter. Everyone raved and raved about those and within minutes, they were all gone. Normally I make homemade dinner rolls but this year, I saved a lot of time making the Pillsbury Grands! for our delicious side of bread.

Last weekend we had some out of town guests here and I left the 4 kids make and bake their own homemade pizza using the can of Pillsbury Pizza Crust. While their pizza isn't the prettiest thing you ever saw...the kids had a blast making it! Just unroll the dough, place it on a rectangular baking sheet, top with pizza sauce, your favorite toppings and a lot of cheese. Bake in the oven and in less than 20 minutes you have a delicious pizza to enjoy!

I love to bake pies but most of the time I don't get my pie crust right. Sometimes it is too dry and at other times its too sticky and moist. How do I solve the pie crust problem? Easy! I buy the Pillsbury Pie Crusts! They are pre-made pie crusts and you get two full crusts in every package. I use one for my bottom crust and one for my top crust. Yesterday I tossed together an apple pie and from start to finish our pie was done in less than 35 minutes flat! No mixing bowls, measuring cups and other nonsense to clean up! Yay!

Don't stress yourself out this holiday season trying to make everything from scratch! Pillsbury has wonderful products available that can help us get in & out of the kitchen fast and have delicious results in the process. You can find some wonderful recipes over on the Pillsbury web site to help spark your baking creativity this holiday season.

Our Thanksgiving was great and I am now super excited for Christmas to get here! I will be doubling my baking and you can bet that I will be using Pillsbury products to help make it easier. Enjoy the holiday season!

Disclosure: Pillsbury sent me coupons to pick up several of their products. How I used them was up to me and all words within this post are 100% mine and have not been influenced by the company. I did not receive any monetary compensation for this post. 

Monday, May 20, 2013

Freezing Homemade Apple Pie Filling


Back in the Fall I went to the local Farmer's Market and purchased a huge amount of apples. Once I got back home with them, I prepared them for freezing. During the winter and spring, I make and bake a lot of homemade apple pies and I always use my frozen apple pie filling to make them.

I typically freeze my apple pie filling in 3 cup portions which is enough for me to make a homemade pie. You may want to freeze yours in smaller or larger portions. I always use up all of my frozen apple pie filling within 4 to 6 months freezing it. In my personal opinion, homemade frozen apple pie filling is a HECK of a lot better than canned!

Homemade Apple Pie Filling for Freezing

Apples
Lemon Juice
Ground Cinnamon
Granulated Sugar
Freezer Bags

Peel and core apples, cut apples into wedges. Place all apple wedges into a large mixing bowl. Sprinkle lemon juice, ground cinnamon and granulated sugar on top. Gently stir mixture until well blended. Spoon mixture into quart sized freezer bags. Purge out the air, zip shut. Label outside of bags.

When ready to use, remove from freezer and thaw at room temperature for about 10 minutes. Then spoon your apple pie filling into an unbaked pie crust and bake.

Friday, April 5, 2013

No Bake Blueberry Cream Pie Recipe


I love blueberries and I love a good homemade pie! This recipe that Omega Juicers sent over to me to share with all of you...well, it looks delicious! I love that it's a "no bake" pie and during those hot summer months, this would make a great dessert to make. With that said, I certainly wouldn't hesitate in making it all year long!

No Bake Blueberry Cream Pie Recipe

Crust:
1 cup pitted dates
2 cup raw almonds
1-2 tablespoons agave nectar (or maple syrup)

Process the dates in a food processor; slowly add almonds until a fine consistency is reached. Add agave nectar or maple syrup. Press mixture into a pie pan.

Filling:

6-8 Frozen Bananas
1 lb. blueberries (fresh or frozen)
1/2 cup dates, pitted

Slice the 2 of the bananas into 1/4” rounds, leaving 4-6 bananas for the creamy filling. Cover the bottom of the pie shell with a layer of banana pieces. Process the fruits through Omega Juicer using the blank screen. After, mix in the remaining blueberries, keeping them whole. Pour this over the sliced bananas in the pie shell. Garnish with chopped walnuts, berries, or chocolate shavings. Freeze until ready to serve.

Optional Toppings:

Fresh Berries
Chocolate shavings
Whipped cream
Chopped walnuts nuts

Friday, November 30, 2012

Mrs. Smith's Signature Deep Dish Pies

This is a partnered post written by me on behalf of Mrs. Smith's. All opinions are 100% mine.

I love to bake pies and I usually bake at least one homemade pie every week. With that said, there are times that I don't have the time to bake a pie from scratch and during those specific times, I turn to Mrs. Smith's Signature Deep Dish pies. Why you might ask? Well, I am going to tell you!

Mrs. Smith's pies are the best frozen pies you can buy that are on the market (at least in my opinion, they are!). You store them in the freezer and then when you need to bake a pie, take them out, read the instructions and simply pop them into the oven for baking. Once done, you have a delicious pie to serve to your family and there was no mess and no fuss involved!
Mrs. Smiths Cherry Pie
Recently I was asked to review the new Mrs. Smith's Signature Deep Dish Pies for all of you. All 4 of the flavors I reviewed, were new ones to me! I was sent coupons to go to my local store to pick them up and I selected the following 4 pies for our review:

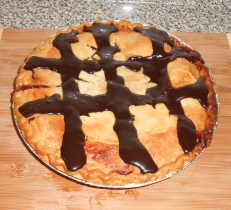
* Mrs. Smith's Signature Deep Dish Cherry Pie with Butter Fudge Sauce
* Mrs. Smith's Signature Deep Dish Peach Pie with Cream Cheese Icing
* Mrs. Smith's Signature Deep Dish Dutch Apple Pie with Caramel Sauce
* Mrs. Smith's Signature Deep Dish Pumpkin Pie with Cream Cheese Icing

These pies are made with real butter (no fake stuff) to create their flaky crusts and they are stuffed to the brim with real fruits! The pies come with icing or sauce packets that you put onto them after they are done baking to create your own unique customized looking pie! How fun is that? Totally fun!
apple pie
I decided to invite my 2 nephews and 1 niece over for some pie baking fun and after our pies were done baking and cooling, I left them use the icing and sauce packets to make their own customized pies! This is a great way to get kids in the kitchen for sure! They had a blast doing this!

We had 7 adults and 3 children here and we loved all 4 pies. With that said, some we liked a little more than others. In the future, I would skip adding the cream cheese icing to the pumpkin pie as it was a tad too sweet with that addition on top...for us! However, you might like your pies sweet so that would be cool for you!

These pies took 50 to 75 minutes to bake in the oven and while they were baking, my entire house smelled like a gourmet bakery! I love how easy they were to make and my family loved eating them!


Disclosure: The makers of Mrs. Smith's Deep Dish Signature Pies provided me with the review items and prize pack products.

Tuesday, November 27, 2012

No Bake Banana Cream Pie Recipe


The great folks over at Omega Juicers sent over this yummy looking recipe for me to share with all of my foodie blog readers today. I am a big fan of anything that has bananas in it, so this pie recipe is definitely on my to-bake list for sure!

No Bake Banana Cream Pie Recipe

Crust:
1 cup pitted dates
2 cup raw almonds
1-2 tsp. vanilla (optional)
1-2 TBS. agave nectar (or maple syrup)

Process the dates in a food processor; slowly add almonds until a fine consistency is reached. Add vanilla, agave nectar or maple syrup. Press mixture into a pie pan.

Filling:

8-10 Frozen bananas

Process the bananas through Omega Juicer using the blank screen. You want the consistency to be VERY thick and creamy, like thick frozen yogurt or soft serve ice cream. Spread banana mixture over crust. Top with topping of your choice and freeze until ready to serve.

Optional Toppings:

Sliced fresh bananas
Chocolate syrup
Caramel syrup

Thank you Omega Juicers for sharing this delicious-looking recipe with all of us!

Monday, September 10, 2012

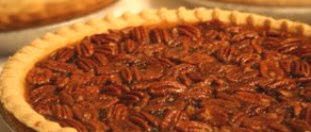
Grandma's Old-Fashioned Pecan Pie Recipe

My husband and mother both LOVE pecan pie and the following recipe is one that I got from my grandmother about 15 years ago. Pecan pie is really easy to make so it's a great recipe for beginner bakers.

Grandma's Old-Fashioned Pecan Pie Recipe

3 large eggs
1/2 cup molasses
1/2 cup light corn syrup
1/4 cup orange juice (not from concentrate)
1 1/4 teaspoons vanilla extract
1 1/2 cups whole pecan halves
9" unbaked pie shell

Preheat oven to 350 degrees F. In a large mixing bowl, beat the large eggs until fluffy. Stir in the molasses, light corn syrup, orange juice and vanilla extract. Blend until all ingredients are well combined. Stir in the whole pecan halves by hand.

Pour the pie filling into your unbaked pie shell. Bake in a preheated oven for 30-35 minutes or until done. Remove from oven and let pie cool on a wire rack. Store cooled pie in an airtight pie container.

Thursday, July 5, 2012

Scrumptious Grasshopper Mint Pie Recipe

This grasshopper mint pie is a great dessert pie to make during the hot summer months when you want a "cold dessert" pie to cool you down. This pie has the perfect blend of mint, the sweetness of cream cheese and of course chocolate. This pie will serve 6 adults.

Grasshopper Mint Pie Recipe

8 oz. pkg. cream cheese, softened
1/3 cup granulated sugar
8 oz. tub frozen whipped topping, thawed
1 cup finely chopped - Keebler Fudge Shoppe Grasshopper Cookies
2-3 drops of green food coloring
1 chocolate crumb pie crust
* additional halved cookies to use for garnishing

Mix the softened cream cheese and granulated sugar with an electric mixer until well blended and smooth. Fold in the thawed whipped topping, chopped cookies and green food coloring. Mix it all together and then spoon the mixture into the chocolate crumb pie crust.

Place the pie in the refrigerator to chill for at least 4 hours. Garnish the top of the pie with cookie halves right before serving.

Tuesday, June 5, 2012

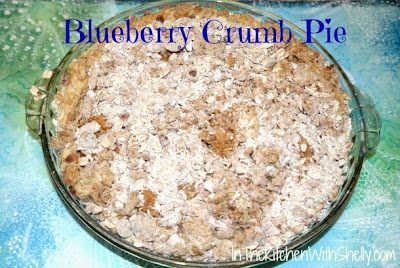
Delicious Blueberry Crumb Pie Recipe

One of my favorite pies when it comes to a good dessert pie happens to be a Blueberry Crumble Pie and this recipe for blueberry pie is really easy to prepare. It will make 8 servings and features my grandmother's crumb topping recipe. It is a family favorite and I hope you enjoy making it!

Easy Blueberry Crumb Pie Recipe

1 (6 ounce) Graham Cracker Crust
1 large egg yolk, well beaten
21 oz. can blueberry pie filling
1/3 cup all-purpose flour
1/3 cup quick-cooking oatmeal
1/4 cup granulated sugar
3 tablespoons butter, softened

Preheat oven to 350 degrees. Brush bottom and sides of crust with the beaten egg yolk and place the crust into the oven and bake for 4 minutes. Remove. Pour the blueberry pie filling into the baked pie crust.

In a large mixing bowl combine together the flour, oatmeal and granulated sugar. Cut in the softened butter and mix it all together until crumbly. Spoon the crumb mixture over the top of the pie filling.

Place pie back into the oven and continue to bake for 30-36 minutes or until done. Remove and let cool to room temperature before serving.

Sunday, April 15, 2012

Delicious Frozen Peanut Butter Pie Recipe

This delicious tasting frozen peanut butter pie is super easy to make and only takes about 15 minutes to prepare. You will need to freeze it for at least one hour before serving it to your guests. If you have stored it in the freezer for several hours you will need to thaw it at room temperature for 10-15 minutes before serving.

Frozen Peanut Butter Pie Recipe

1 (3 ounce) package of cream cheese, softened
1 cup confectioner's sugar
1/3 cup of creamy peanut butter
1/2 cup cold milk
10 oz. container frozen whipped topping, thawed
1 baked pie shell or 1 graham cracker crust

In a large mixing bowl whip the cream cheese with an electric mixer until soft and fluffy. Beat in the confectioner's sugar and creamy peanut butter. Slowly add in the cold milk until all ingredients are well combined. Fold in the container of whipped topping. Spoon the pie filling into a baked pie shell or a graham cracker crust. Place pie into the freezer for one hour before serving. Thaw for 15 minutes before serving it to your guests.

Tuesday, February 28, 2012

Grandma's Old-Fashioned Cherry Pie Recipe

My husband's favorite pie happens to be a good old-fashioned cherry pie and this recipe was given to us by his grandmother. You can top it with a full crust or do a lattice crust...whatever you prefer.

Grandma's Delicious Old-Fashioned Cherry Pie Recipe

4 cups frozen unsweetened tart cherries
1 cup dried tart cherries
1 cup granulated sugar
2 tbsp. quick-cooking tapioca
1/2 tsp. almond extract
Pastry crust for a double-crust 9" diameter pie
1/2 teaspoon ground nutmeg
1 tbsp. butter, softened

In a large mixing bowl combine together the frozen cherries, dried cherries, granulated sugar, tapioca and almond extract until well blended together. Let this mixture stand for 20 minutes.

Line a 9" round glass or metal pie plate with one pastry crust and spoon the cherry filling into the crust, spreading it out to make it even. Sprinkle the ground nutmeg on top and dot with softened butter. Cover with a top crust (or a lattice crust). (make slits in crust if using a full crust so that the steam can escape).

Bake in a preheated 350 degree oven for 50-55 minutes or until done. You can cover the edges of your crust if it starts getting too brown with some foil. Remove from oven and let it cool down to room temperature before serving. Refrigerate leftovers.

Delicious Lemon Buttermilk Pie Recipe

My 86 year old great auntie loves anything that is lemon flavored and one of her favorite pies is this Lemon Buttermilk Pie recipe. This pie is really easy to prepare and makes 8 servings. I try to make this pie for her about every 8 weeks because she loves it so much! I will admit, you have to LOVE lemons to enjoy this pie because it has a medium-lemon taste to it.

Lemon Buttermilk Pie Recipe

9" unbaked pie crust (for a deep dish pie)
1 1/2 cups granulated sugar
1 stick of butter, softened
3 large eggs
1 cup buttermilk
1 tablespoon cornstarch
1 tablespoon fresh lemon juice
1/2 teaspoon salt

Preheat oven to 350 degrees. Place unbaked pie shell into a deep dish pie pan and bake in the oven for about 5 minutes (to brown the crust). Cool. Turn the oven down to 325 degrees. In a large mixing bowl combine together the granulated sugar and butter with an electric mixer until creamy and smooth. Add in the eggs, one at at ime, beating well after each egg addition. Add in the buttermilk, cornstarch, lemon juice and salt. Mix batter until well combined. Pour the lemon pie filling into the baked pie shell.

Place pie into a preheated 325 degree oven and bake for 50-55 minutes or until center of the pie is done. Remove and let cool on a wire rack. Once cool place wrap on the top and store it in the refrigerator until serving time.

Monday, February 20, 2012

Dairy-Free Pumpkin Pie by Wholly Wholesome

Today I would like to introduce you to the company called Wholly Wholesome who was founded in 1996 in Morristown, New Jersey. This wonderful company makes a variety of natural foods that are ready-to-eat or ready-to-bake that you and your family will love!

My Review: The great folks over at Wholly Wholesome sent me a frozen Dairy-Free Pumpkin Pie to review for all of you. The line of ready-to-bake pies available from Wholly Wholesome include: Apple, Blueberry, Cherry, Harvest Berry, Peach, Pumpkin and Dairy-Free Pumpkin pies. All of their pies are naturally Vegan and this particular Dairy-Free Pumpkin Pie has 0 grams of Trans Fat per serving.

The pie arrived in a cooler packed on dry ice. I put it into my freezer until the weekend and then took it out to bake it. I simply put it into a preheated 350 degree oven and baked it for around 50 minutes or so. Once done I removed it and left it cool. Later that day I served the pumpkin pie to my family. Some of us ate our slice of pie plain and others had some frozen whipped topping on top...regardless of how we ate it, we all agreed that it was delicious!

You would of never guess that NO dairy products were used to make this pumpkin pie. In addition, you would of never guessed that it was a prepackaged frozen pie. Since hubby and I are both watching our weight we appreciate that it has no trans fat, no hydrogenated fats or oils which are really unhealthy to consume. The taste of the pie was fabulous along with the texture & flakiness of the crust. We give this pie a big 2-thumbs up!

You can follow/like Wholly Wholesome over on Facebook and/or follow them over on Twitter. I would like to thank Wholly Wholesome for participating in this product review. Your Dairy-Free Pumpkin Pie was delicious!

Disclaimer: Shelly Hill has personally reviewed the product listed above. Shelly has not received any monetary compensation for her review. Shelly did receive a free product to try out so she could evaluate and use it for her review. Her thoughts & opinions in this review are unbiased & honest and your opinions may differ. The Shakin N Bakin Blog is not responsible for delivery/shipping of giveaway items won from this blog nor are we responsible for mis-use or injury caused by items won from this Blog. Content on this blog is copyrighted, all rights reserved.

Tuesday, December 13, 2011

Frozen Creamy Dreamy Pumpkin Pie Dessert Recipe

Today I am sharing with you a fabulous recipe that I got from my nurse friend Jordan who works at one of our local hospitals here in Pennsylvania. This is her own recipe and trust me, it is delicious! This girl can cook! The approximate prep time is 20 minutes. A nice decadent dessert to go along with your Thanksgiving and Christmas Holiday meals!

Frozen Creamy Dreamy Pumpkin Pie Dessert Recipe

Emerald Glazed Pecans (used for topping)
2 teaspoons pumpkin pie spice
1/2 cup brown sugar, packed
8 oz. Honey Nut Flavored Philadelphia Cream Cheese, softened
15 oz. can pumpkin puree
1 tub Cinnamon Cool Whip + 2 teaspoons ground cinnamon
1 Graham Cracker Pie Crust
1 Jar Caramel Sauce (for garnish)

Directions: With an electric mixer combine the brown sugar, canned pumpkin, pumpkin pie spice and softened cream cheese until smooth. Fold in the Cool Whip and ground cinnamon. Sprinkle 1/2 of the package of glazed pecans over the graham cracker crust and then cover the crust with the pie filling that you just prepared. Drizzle the caramel sauce over top (however much you would like) and place the remaining 1/2 bag of glazed pecans on top.

Store pie in the refrigerator or freeze. If freezing, remove it from freezer 40 minutes before serving.

Saturday, November 12, 2011

Easy To Make Classic Pumpkin Pie Recipe

'Tis that time of year when everyone is looking for the classic pumpkin pie recipe for their upcoming Thanksgiving dinner so today I thought I would post for all of you my aunt's recipe for her delicious creamy pumpkin pie! This recipe is really easy to make because you make it in one bowl only and you use a store bought pastry pie crust.

Classic Pumpkin Pie Recipe

1 1/2 cups pumpkin puree
1/2 cup milk
1/2 can evaporated milk
1/2 cup brown sugar
1/2 cups granulated sugar
1/4 teaspoon salt
1/4 teaspoon ground nutmeg
1/4 teaspoon ground cinnamon
2 large eggs, well beaten
1 teaspoon butter, softened
2 unbaked store bought pie crusts

In a large mixing bowl combine together the dry ingredients first and then add in the moist ingredients one at a time, mixing after each addition with an electric mixer. Mix until the batter is creamy and smooth. Pour batter into 2 unbaked pie crusts. Preheat oven to 350 degrees F and place your pie pans onto a baking sheet and then slide them into your oven. Bake for 25-27 minutes or until the center of each pie is done. Remove and let cool before serving.

You can serve it plain or top with your favorite vanilla whipped topping, vanilla ice cream or vanilla yogurt.

Friday, October 28, 2011

Super Easy To Make - Banana Cream Pie Recipe

About 10 years ago I started making this delicious Banana Cream Pie recipe for my family and they absolutely love it and I love that it is super easy to make! We especially like this pie during the spring, summer and fall but you can certainly make it year round.

Banana Cream Pie Recipe

1 9" graham cracker crust
2 large and ripe fresh bananas
1 8-ounce pkg. softened cream cheese
2 cups milk
1 3-ounce pkg. instant vanilla pudding mix
toasted coconut

Slice the fresh bananas into the bottom of your graham cracker crust. Gradually add 1/2 cup cold milk to the softened cream cheese. Mix it for 3 minutes or until well blended. Add the instant pudding and stir in the remaining cold milk. Beat slowly for 1 minute with an electric mixer. Pour mixture into the graham cracker crust. Chill the pie for 3 hours in the refrigerator before serving. Right before serving time garnish the top with toasted coconut flakes.

Monday, October 17, 2011

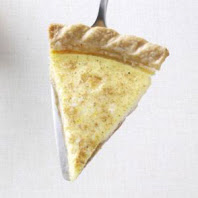
Scrumptious Caramel Custard Pie Recipe

Wow...just looking at that photo is enough to make my mouth water! The great folks over at Taste of Home sent over this recipe for their Caramel Custard Pie for me to share with all of my foodie blog readers. This would make a fantastic dessert pie come Thanksgiving!!!

Caramel Custard Pie Recipe

•Pastry for single-crust pie (9 inches)
•2/3 cup packed brown sugar
•4 teaspoons all-purpose flour
•3 large eggs
•2 cups 2% milk
•1/4 cup granulated sugar
•1 teaspoon vanilla extract
•1/8 teaspoon salt
•1/8 teaspoon ground nutmeg

•Line a 9-in. pie plate with pastry; trim and flute edges. Combine brown sugar and flour; press into pastry. In a large bowl, combine the eggs, milk, sugar, vanilla and salt; pour over brown sugar mixture. Bake at 350° for 55-60 minutes or until a knife inserted near the center comes out clean. Cover edges with foil during the last 15 minutes to prevent overbrowning if necessary. Cool on a wire rack; sprinkle with nutmeg. Refrigerate for at least 2 hours before serving. Yield: 8 servings.

Nutrition Facts: 1 piece equals 277 calories, 10 g fat (4 g saturated fat), 89 mg cholesterol, 201 mg sodium, 41 g carbohydrate, trace fiber, 6 g protein.

Disclosure: This recipe was given to us by the PR firm that handles PR work for Taste of Home. You can find additional recipes by visiting the Taste of Home web site. Thank you for your recipe contribution!

Saturday, October 8, 2011

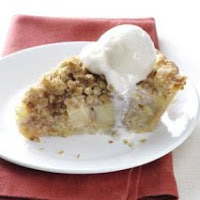
Taste of Home's Pineapple Apple Pie Recipe

Here at our home we absolutely love apple pie and this recipe from the great folks over at Taste of Home looks absolutely delicious! They sent over this recipe to me so that I could share it with all of my SNB foodie blog readers! Enjoy!

Pineapple Apple Pie Recipe

•Pastry for single-crust pie (9 inches)
•1 can (20 ounces) crushed pineapple
•3 medium tart apples, peeled and chopped
•1/2 cup all-purpose flour
•1/2 teaspoon ground cinnamon
•1/2 teaspoon ground nutmeg

TOPPING:

•1/2 cup quick-cooking oats
•1/3 cup packed brown sugar
•1/4 cup all-purpose flour
•2 tablespoons plus 2 teaspoons butter, melted

Line a 9-in. pie plate with pastry; trim and flute edges. Drain pineapple, reserving 3/4 cup juice. In a large bowl, combine the apples, pineapple and reserved juice. Combine the flour, cinnamon and nutmeg; add to apple mixture and toss to coat. Transfer to pastry. In a small bowl, combine the oats, brown sugar, flour and butter; sprinkle over filling. Bake at 375° for 40-45 minutes or until filling is bubbly and topping is browned. Cover edges with foil during the last 15 minutes to prevent over-browning if necessary. Cool on a wire rack. Yield: 10 servings.

Nutrition Facts: 1 piece equals 259 calories, 9 g fat (4 g saturated fat), 12 mg cholesterol, 105 mg sodium, 43 g carbohydrate, 2 g fiber, 3 g protein

Disclosure: This recipe was given to us by the PR firm that handles PR work for Taste of Home. You can find additional recipes by visiting the Taste of Home web site. Thank you for your recipe contribution!