Welcome To The Shakin 'N Bakin Blog!

Welcome to my blog! I love to cook and bake for my family. I hope you enjoy the recipes, foodie reviews, foodie giveaways and cooking tips posted on my blog.

How to Print Recipes: You can print out each individual recipe featured on this blog by clicking the "share" button at the bottom of each post. It will open up to show you options, click on print and another window will open up with the recipe inside it for printing. You can also use the SHARE button to email a copy of the recipe to yourself for printing later.

Showing posts with label Fruits. Show all posts

Monday, October 15, 2018

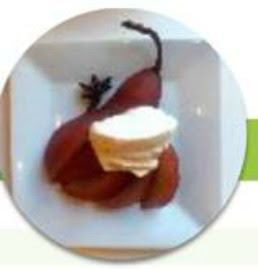
Red Wine Poached Pears Recipe

Spice Islands teams up with Taste Buds Kitchen as their Official Spice Partner in a year-long program that includes thousands of cooking classes, workshops and special events nationwide from May 2018 through May 2019.  During the classes instructors guide participants in amazing ways to cook with spices to enhance meals for the whole family. Cooking classes using Spice Islands will inspire people to turn to spices when creating recipes to make them more interesting and flavorful. For more information including the upcoming schedule and to register for Taste Buds Kitchen cooking classes featuring Spice Islands premium spices, visit their website.

This is a guest-post recipe. We are not responsible for recipe errors.

Red Wine Poached Pears Recipes

Red Wine Poached Pears Recipe

1 ½ cups red wine
1 ½ cups water
¼ cup sugar
½ orange, sliced
4 cloves
1 Spice Islands® Cinnamon Stick
1 Spice Islands® Star Anise
2 Bosc pears

Whipped cream

½ cup heavy cream
1 tbps confectioners sugar
1 tsp Spice Islands® Vanilla Extract
Pinch freshly grated Spice Islands Cinnamon

In a shallow pot, large enough to hold several pears laying flat on the bottom, bring red wine, water, sugar, orange slices and Spice Islands spices to a boil and reduce to a simmer.

While liquid boils, peel pears, but in half and core. Leave stem attached if possible. Place pears into simmering poaching liquid and poach for 30 - 60 minutes (depending on size and ripeness of pear) until tender when pierced with a fork.

While pears poach, make fresh whipped cream. Put heavy cream, confectioners sugar and vanilla extract in a large bowl and whisk briskly until fluffy (do not over whip). Keep whipped cream chilled until pears are ready.

Once pears are poached, move to a cutting board and cut 5 - 6 slices out of each half, keeping the top intact. Fan pear slices out onto a plate. Top with whipped cream and freshly grated Spice Islands Cinnamon.

Monday, December 25, 2017

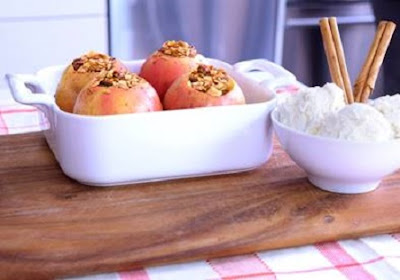
Baked Granola Apples Recipe

Baked Granola Apples Recipe
During the fall and winter seasons apples, bananas and various citrus fruits are plentiful around here. Since our grocery store and farmer's markets are packed with them and offering them at a great price, we tend to buy them in bulk and use them as often that we can. Apples are definitely one of our go-to fruits during the season and I'm often using them to bake. We enjoy apple bread, apple cake, apple pies and all sorts of other tasty dishes uses fresh apples!

Today's guest post recipe is courtesy of Viki's Granola.

Baked Granola Apples Recipe

3 tablespoons cold butter, diced
3 tablespoon dark brown sugar
1/2 teaspoon brown sugar
Pinch of salt
4 apples, washed and dried
1 cup of Viki’s Apple Cinnamon Granola
Vanilla ice cream

Preheat oven to 375°. In a bowl combine butter, brown sugar, cinnamon and salt. Take good care to mash everything together with a fork. Use a melon baller, apple corer or paring knife to remove apple cores; don’t go all the way through. Place apples in a small baking dish and fill with butter mixture and bake for 30-40 minutes. To serve top with Viki’s Apple Cinnamon Granola and a scoop of ice cream.

Sunday, November 5, 2017

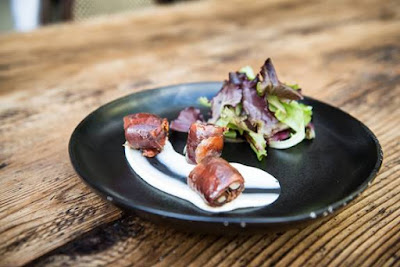
Delicious Roasted Dates Recipe

Delicious Roasted Dates Recipe
The cooler temperatures have finally set in and the holidays are just around the corner. During this time of the year I'm always looking for new recipes to make for upcoming family get-togethers. Today's guest post recipe is courtesy of Villa Azur. The easy to make dish combines dry dates, prosciutto, manchego cheese and honey to create irresistible flavors sure to make any host shine at home. It will make 4 servings.

Roasted Dates Recipe

36 pitted dry dates
12 slices of Bayonne Prosciutto
Manchego cheese: 4oz
Honey: 1/2 tablespoon
Heavy cream: 1 cup

Melt half the Manchego cheese with the cream in a saucepan, salt and pepper, boil and then mix everything together in a blender. Put aside in a cooler. Stuff the dates with Manchego cheese: 2gr per date, Wrap the dates 3 by 3 with one slice of Bayonne prosciutto. Bake the dates in an oven at (400F) for 4 minutes, then top the dates with honey and re-bake for 1 minute. Plate and serve with the dressing on the side.

Sunday, July 16, 2017

Homemade Blueberry Crisp Recipe

When it comes to easy-to-make desserts, a fruit crisp is one of the easiest desserts that you can make. Throughout the year I'll make peach, apple, cherry, strawberry and blueberry crisp, with the latter being our favorite. When I make it, I always use my mother's recipe which I'm sharing with you today.

When I serve it, my family enjoys it with vanilla bean ice cream on top. However, you can also serve it plain or with your favorite topping (vanilla yogurt, whipped cream, cold milk, etc.).

Homemade Blueberry Crisp Recipe

Easy Homemade Blueberry Crisp Recipe

1 bag of Frozen Organic Blueberries (12 to 14 ounces), partially thawed
1/4 cup butter, softened
3/4 cup brown sugar
1/4 cup granulated sugar
1/4 to 1/2 cup quick oats (oatmeal)
1/2 cup all-purpose flour
1/4 tsp. salt

Preheat oven to 350 degrees F.

Grease the bottom of a glass casserole dish with butter. Place partially-thawed blueberries into the bottom of the casserole dish.

In a medium-sized mixing bowl: Mix together the granulated sugar and salt. Sprinkle this mixture on top of the blueberries.

In a medium-sized mixing bowl: Cream together the softened butter and brown sugar until creamy. Mix in the quick oats and all-purpose flour until all ingredients are well-combined. Sprinkle this mixture on top.

Bake in a preheated 350 degree F. oven for approximately 18-20 minutes or until done. Don't over-bake it or it will become dry. Remove from oven to let cool

Tuesday, June 6, 2017

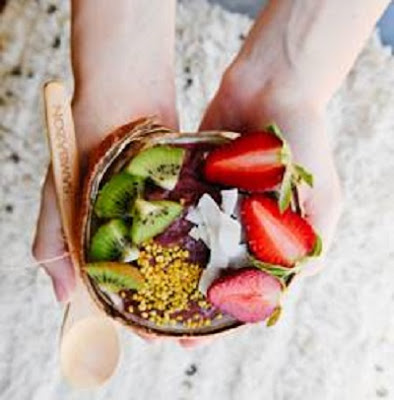
SAMBAZON Acai Bowl Recipe

SAMBAZON Acai Bowl Recipe
SAMBAZON was the first company to bring Acai to the U.S. from Brazil and sustainably manages more than 2.3 million acres of the Amazon forest. Full of antioxidants and healthy omegas, this organic acai bowl recipe is fun to make and the best part is there’s absolutely zero waste. The recipe is courtesy of SAMBAZON.

SAMBAZON Acai Bowl Recipe

2 Sambazon Superfruit Packs (Original Blend, Performance Protein or Pure Unsweetened)
1 Young Coconut
1/4 cup Juice from Young Coconut (drink the rest!)
1/2 cup frozen Mango Chunks or Frozen Mixed Berries
Meat from Young Coconut
Ginger or Turmeric (optional)
Honey to taste (optional)
Top with gluten free granola, fresh seasonal fruit, coconut shreds and bee pollen (to help support the pollinators!)

TO MAKE: Crack your coconut, save the water, scoop out the meat and save the shell for your bowl!

In your blender, break both Sambazon Superfruit packs, add about 1/4 cup coconut water (drink the rest), scoop in your fresh coconut meat, frozen berries, ginger (optional) and honey to taste (optional). Blend and scoop into your leftover coconut shell. Top with gluten free granola, fresh seasonal fruit, coconut shreds and bee pollen (to help support the pollinators!)

Monday, January 23, 2017

Blueberry Cobbler Dessert Recipe

Easy Blueberry Cobbler Dessert Recipe
Homemade cobblers are one of the easiest dessert recipes that you could ever make. For the post part, cobblers only require a handful of ingredients and take only a few minutes to prepare. The hardest part when it comes to making them...is waiting for them to bake.

We love fruit cobblers and one of our favorites is blueberry. While you can use fresh ones, I prefer to use frozen ones that have been partially thawed. They taste just as good and one of my favorite brands is Wyman's of Maine. Here's the recipe that I like to use. Plus, you can serve it with vanilla bean ice cream or frozen whipped topping on the top, if desired.

Homemade Blueberry Cobbler Recipe

1/2 cup butter, melted
1 cup all-purpose flour
1 cup granulated sugar
1 cup milk
3 cups frozen Wyman's of Maine Wild Blueberries, partially thawed

Preheat oven to 350 degrees F.

Melt butter in a glass measuring cup in your microwave for 10-15 seconds. Remove and pour the melted butter into your 8" by 8" baking dish.

In a large mixing bowl combine together the all-purpose flour, granulated sugar and milk. Your batter should be smooth with just a tad bit of lumps. It shouldn't be overly-runny. If so, add a little bit more flour. Once batter has been combined, pour the entire bowl of batter into the baking dish on top of the melted butter. Do NOT stir. Pour the partially thawed Wyman's of Maine Wild Blueberries on top of the batter.

Place baking dish into a 350 degree F preheated oven. Bake for 45 to 55 minutes or until done. Remove and let cool in the baking dish. Refrigerate once cool and ready to serve.

Monday, July 25, 2016

Healthy Acai Berry Smoothie Recipe

Several times a week we make homemade fruit smoothies. We got on our smoothie kick about 2 years ago for health reasons and ever since then...we've been making them. I think it's really important that you experiment with different fruit combinations and keep changing them up, so that you don't get bored with the same old flavors and lose interest. When we make them, we use a combination of fresh fruits mixed with frozen fruits, depending on the time of year.

A friend of mine is a big fan of acai berry smoothies and introduced us to the Sambazon Original Blend Acai Berry Superfruit Packs. Each of these larger packs comes with 4 single serve puree packs which makes smoothie-making really easy. You store them in the freezer until you're ready to use them. To thaw: Just run the frozen puree pack under hot water for 15 seconds or so, open it up and pour into your blender container.
Acai Berry Smoothie Recipe

1 Acai Berry Original Blend Superfruit Pack
1/2 Fresh Banana
1 cup Coconut Water
* optional - Dash of Honey

Combine the Acai Berry Original Blend Superfruit Pack, fresh banana, coconut water and honey in a blender and blend until smooth.

Note: Sometimes I like a "thicker and richer" smoothie, so I'll toss a 1/4 cup of organic vanilla bean ice cream into the blender too. I guess that makes it more like a milkshake...but trust me, it's good! My husband likes to toss in chia seeds or flax seeds in his smoothie and my mother likes added a 1/4 cup of plain or vanilla yogurt to hers. Enjoy!

Friday, June 17, 2016

Yonanas Banana Strawberry and Mango Ice Cream

Some of you may know...I own and manage another successful lifestyle blog called The Classy Chics and review a lot of products on that blog. Matter of fact, we discuss and feature a lot of recipes, crafts, beauty tips, home decor, health & wellness and all sorts of different topics & features.

Back on May 31st, I had the opportunity to review the Yonanas Ice Cream Maker which utilizes frozen fruit to make soft-server ice cream. You can use any type of frozen fruit that you would like and within minutes...you have a fruity cold treat to enjoy! You can check out my review and grab an additional recipe by reading my Yonanas Ice Cream Maker post.

Today...I'm featuring another recipe for all of you here on the Shakin 'N Bakin Foodie Blog.

Yonanas Banana Strawberry and Mango Ice Cream

2 frozen bananas
1/2 cup frozen strawberries
1/2 cup frozen mango chunks

Let your frozen fruits sit out at room temperature for 10 -15 minutes. Insert 1 banana into the Yonanas Ice Cream Maker, then your frozen strawberries, then 1/2 of another frozen banana, then the frozen mango chunks and finish it all up with the last 1/2 of banana. Once it's all in your bowl...stir it up together to blend all of the flavors.

If you like the consistency of soft-serve ice cream...enjoy it immediately. If you like your ice cream a little firmer, cover the bowl and place into the freezer for 30 minutes. I like to make up medium to large batches at one time and just freeze them for later use. This way my family can get in and grab what they want...when they want it! Enjoy!

Disclosure: Shelly received a complimentary Yonanas Ice Cream Maker to review and feature on her other blog. No monetary compensation was received.

Friday, April 15, 2016

Chilled Raspberry and Cucumber Soup Recipe

A few years ago we planted 5 raspberry bushes in our backyard and started our own berry patch. Last year...those 5 bushes gave us a wonderful harvest of fresh raspberries and they were plump, juicy and delicious. I made a lot of raspberry muffins, jelly and jam, plus we ate fresh ones by the handful. We love those beautiful red berries and they're healthy for you to eat too!

On top of growing our own berries, we also plant a medium-sized backyard garden and cucumbers grow very well for us too. I'll definitely have to make this recipe when I harvest my garden goodies this year.

Today's guest post recipe is courtesy of Chef Anthony Stuart, Executive Chef at Pritikin Longevity Center + Spa. For those of you who measure out your portions, 1 cup per serving. Chef's note: Fresh basil or mint goes nicely with this dish

Chilled Raspberry and Cucumber Soup Recipe

3 cups fresh raspberries washed
1 cup seedless cucumber chopped
¼ cup seedless cucumber finely diced for garnish (reserve for the end)
¼ cup apple juice concentrate
3 cups water

Combine all ingredients in a blender (except finely diced cucumber) and blend. Chill and serve with a garnish of finely diced cucumber on the top.

Disclosure: Recipe and photograph were used with permission.

Monday, March 28, 2016

Homemade Apple Crisp Recipe

During the month of September I spend many hours in the kitchen home-canning my Fall harvest. One of the things I like to can is apples because I can use them in various recipes throughout the winter and spring seasons. I can used home canned apples to make apple pies, apple dumplings, cobbler or crisp, breads and a whole host of other yummy things.

One of the recipes I like to use when it comes to making a homemade apple crisp is this one that only requires a handful of ingredients. The recipe calls for freshly sliced apples but I used my canned ones. For home canners, I use one quart jar and one pint jar of canned apples and I bake my crisp in a 2 quart baking dish. Another tip, make sure you use the quick-cooking rolled oats (quick oatmeal) and not the other kind. I think the quick oats make the dish better.

Homemade Apple Crisp Recipe

3 large apples peeled, cored, sliced thin
3/4 cup brown sugar
1/2 cup all-purpose flour
3/4 cup quick cooking rolled oats
1/2 cup butter, softened
1/2 teaspoon ground cinnamon

Lightly grease your baking dish with a little bit of butter. Place your sliced apples into the dish. If you're using canned apples, drain away the liquid before putting the apples into the baking dish; set aside.

In a large mixing bowl combine together the brown sugar, all-purpose flour, quick cooking rolled oats (oatmeal) and ground cinnamon. Stir to sift those ingredients together. Stir in the softened butter and use your hands to combine all of the ingredients together until crumbly.

Pour the crumbly mixture on top of the apples in the prepared baking dish. Preheat oven to 350 degrees F. Bake in the oven for 18 to 22 minutes or until done. The baking time will vary between using fresh apples or canned apples since canned apples are already partially cooked. Once it's done baking, serve warm.

Thursday, March 10, 2016

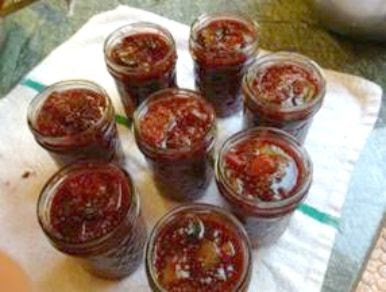
Mission Fig Conserve Recipe

When people think of "figs" they usually think of it as a filling in a delicious cookie. However, figs can be used hundreds of different ways, including as a delicious condiment like shown below. This condiment is perfect for cheese and paté. The recipe is courtesy of: Paulding and Company and will yield approximately 1 quart.


Mission Fig Conserve Recipe

2 lbs. Mission figs, stemmed and coarsely diced
3/4 cup honey
1/2 cup Port (I used a local Merlot Port from Trentadue Winery)
¼ tsp. salt, or more to taste
1 small Meyer lemon, seeded and finely diced (skin and flesh), or the zest and juice from a regular lemon
dash of ground cinnamon — not more than 1/8 tsp., or it will overwhelm the flavors
Dash of Sriracha sauce or your favorite hot sauce

Combine figs with remaining ingredients except hot sauce in a 2-quart pot. Bring to a simmer, and cook until thick, about 15-20 minutes, on medium heat. Stir frequently to be sure the mixture doesn’t stick. The finished product will be thickly syrupy. Test a bit by letting it cool on a spoon. It shouldn't be runny.

Taste the mixture, and if it needs a bit more lemon juice or salt, add it in, then add the dash of Sriracha sauce at the end. I use my homemade, which is very hot from my home-grown peppers, but commercial should be fine too. This is a perfect condiment to can and give as a gift. I made four small one-cup jars, which I processed in a water bath for 20 minutes, and still had a bit more to nibble on. If you don’t can the conserve, store it in the refrigerator. It should keep for about a month; there’s not as much sugar in it as a jam, so it won’t last forever.

Wednesday, February 3, 2016

Banana Mango Smoothie Recipe

We are big smoothie drinkers here at my home. We make fruit smoothies at least twice a week. We tend to make them with whatever fruit is in-season or whatever I have on hand. One of my particular favorites to make is a good banana, mango and pineapple fruit blend smoothie! There is just something super delicious about combining all three of those fruits together into one tasty drink!

Banana Mango Smoothie Recipe

1 medium banana, sliced
1 mango, peeled and sliced
1 cup low-fat milk
1 cup plain yogurt
1/2 cup pineapple juice
1/2 to 3/4 teaspoon honey
handful of ice cubes

Place all of the above ingredients into your blender container except for the ice cubes. Blend for 10-15 seconds. Remove the lid and toss in a handful of ice cubes. Cover and blend until it's your desired consistency. Pour into chilled glasses and serve immediately.

Note: Sometimes when I don't have plain yogurt on hand...I will substitute with 1 cup of plain vanilla bean ice cream which makes it really good...but a tad more in the calorie department. You can use fresh or partially thawed (from frozen) bananas and mangoes with this recipe.

Sunday, January 31, 2016

Banana and Apple Oatmeal Breakfast Bars Recipe

Several months ago my husband and I made the commitment to start eating healthy. One of the areas that we've always been terrible at is eating a healthy breakfast. It's just too easy when you get up at 5:30 AM to grab something unhealthy from the refrigerator or to just skip it all together (which leads to snacking all day long!).

Recently we've been making these delicious banana, apple and oatmeal breakfast bars and we absolutely LOVE them! They are really easy-to-prepare and only take a handful of ingredients. If you have a larger-sized family...you can easily double up the ingredients and make a larger batch. When I make them...I pour the batter into an 8" by 8" glass baking dish.

Healthy Banana and Apple Oatmeal Breakfast Bars Recipe

3 large ripe bananas, mashed
2 cups quick oats (oatmeal)
1/2 tsp. vanilla extract
1/3 cup applesauce
1/4 cup almond milk
1/2 to 3/4 tsp. ground cinnamon

* Optional: 1/4 cup raisins

In a large mixing bowl combine all ingredients together until well-blended. Preheat your oven to 350 degrees. Pour the batter into an 8" by 8" ungreased glass baking pan. Place baking pan into the oven and bake for 12 to 15 minutes or until done. It will look lightly toasted on the top. Remove from oven and let cool. Cut into bars and store them in an airtight container.

Note: Not only do these make a great healthy option for breakfast but they are also great for snacking on during the day. A LOT more healthier than eating junk food! You can print out this recipe by clicking on the SHARE button located at the bottom of this post. You can then click on email it to yourself for printing or click on the PRINT NOW button.

Saturday, January 9, 2016

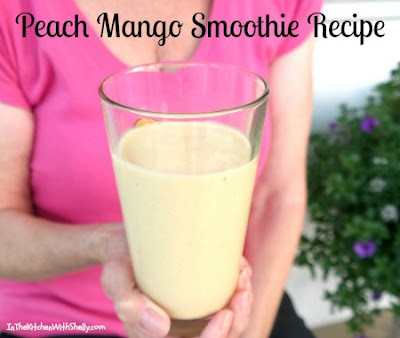
Peach Mango Smoothie Recipe

One of my favorite fruit smoothie combinations happens to be peach and mango! I seriously could drink one of these smoothies almost every day! There is just something delicious about combining juicy peaches with juicy mangoes which makes them just perfect!

When I make these smoothies I like to use this quick and easy recipe. When it comes to the milk...I use whole milk but my husband who is on a diet using skim milk. My mother on the other hand will use coconut milk and my adult daughter prefers almond milk. You can use your favorite milk! In addition, I don't add any type of sugar because I find adding the honey makes it sweet enough for me. However, my daughter adds a teaspoon of granulated sugar and a 1/4 teaspoon of ground cinnamon to hers while mixing the ingredients in the blender.

Peach and Mango Smoothies Recipe

1 1/2 cups milk
1 1/2 cups frozen sliced peaches
1 cup frozen sliced mangoes
1 tablespoon honey
1/2 teaspoon vanilla extract
1 cup ice cubes

In your blender container combine all of the above ingredients together. I toss my peaches and mangoes into the container partially thawed from my freezer. I like to thaw them partially in the refrigerator for 2 hours before blending or at room temperature for 20-30 minutes. Cover the container and process for 15 to 20 seconds or until it's the desired consistency that you prefer. Pour into chilled glasses and enjoy immediately.

Wednesday, October 28, 2015

Easy and Fun Halloween Party Recipes

Of course, Halloween is all about the candy, but that doesn’t mean that it’s all your kids need to eat on the big day. This year, you can keep them properly fueled, while still serving up the spooks, with the below healthy snacks. Try them after school, after trick or treating, or as Halloween party treats. And since all of these are easy to create, kids can help with the assembly for a fun family activity!

The following Halloween party recipes are courtesy of Terra's Kitchen.


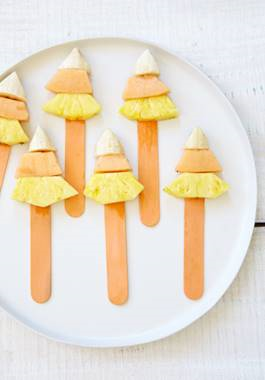
Candy Corn Fruit Skewers Recipe

White: pear, jicama, banana
Orange: cantaloupe, apricot, mango
Yellow: pineapple

Choose one of each color fruit. Cut progressively larger size triangles and thread onto lollipop sticks to look like oversize candy corn. Served chilled.

Kiwi Spiders Recipe

Kiwis
Mini pretzels

Carefully peel kiwi with a vegetable peeler. Cut off a small lengthwise piece (the belly of the spider) so it sits flat on a plate. Break mini pretzels into curved pieces and insert 3 legs on each side. Carve out little indentations for eyes and serve. (You might also try raisins or chocolate chips, if you can figure out a way to make them stick!).

Wednesday, October 14, 2015

Healthy Munchy Freeze-Dried Fruit Snacks

How many of you get the recommended daily allowance for fruit? How many of you snack on healthy options or grab a nasty bag of potato chips? A candy bar? Well...times are changing and these days you can find all kinds of healthy snack options that are just waiting for consumers to enjoy.

One such option are the Healthy Munchy freeze-dried fruit snacks that are made from nothing but freshly picked, in-season fresh fruits. Fuji apples, pineapples or bananas that are low calorie (up to 90 calories per serving) and contain no additives! If you are struggling to get the recommended daily allowance for fruit into your system...the Fuji Apple flavor contains the equivalent of 2.2 apples! Not only that...these fruits are a great source of dietary fiber.

My family recently received several packages of the Healthy Munchy fruit snacks to try out for all of you. We received two bags of each of the three flavors:

* Fuji Apple Crispies
* Pineapple Crispies
* Banana Crispies

Besides these flavors they also have Mango and Pear Crispies, All are gluten-free, wheat-free, dairy-free, peanut-free and no sugar has been added which means no fat! If your kids love Dora the Explorer and Sponge Bob...look for those specially designed packages.

One of the things I LOVED about the flavors that we got to review is that they are "true" flavors. The apple tastes like an apple...the pineapple, a pineapple and so forth. Second, they weren't all dried out and leathery. They had a really nice texture and flavor to them. Like crispy? Well, they are! They're crispy but soft enough that anyone can chew comfortably.

Another great thing about the Healthy Munchy dried fruit snacks is that they are affordable! Each pouch has a MSRP of $1.49 per pouch! They are a HEALTHY alternative compared to potato chips, candy bars, cheese curls and other garbage that you find on the store shelves and in vending machines. Plus...you are getting a serving of fruits which we all need to consume more of!

You can learn more about Healthy Munchy and their wonderful freeze-dried fruit snacks by visiting their site online and by connecting with the company on Facebook.

Disclosure: Shelly received complimentary products that were featured in this post. No monetary compensation was received. Regardless, Shelly's thoughts, opinions and words are 100% her own and unbiased opinion. Your thoughts may differ.

Wednesday, October 7, 2015

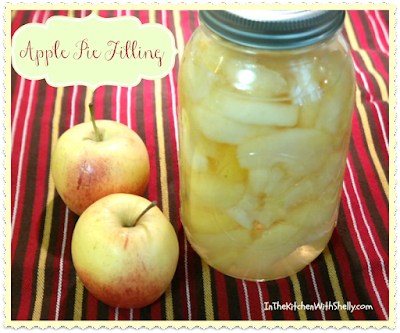
Home Canning - Apple Pie Filling Recipe

I love to make and can my own apple pie filling. The fruit filling can be used all kinds of different ways. I've used it to make apple pies, crisps, cobblers, turnovers, cakes, breads, etc. Seriously, this apple pie filling recipe is very versatile and it's a staple in my pantry. Every year I make and can at least 2 dozen jars of homemade apple pie filling!

The recipe that I like to use is from the Ball Blue Book - Guide to Preserving. This recipe will yield 6 to 7 pint jars.

Home Canning - Apple Pie Filling Recipe

10 lbs. apples
Ball Fruit-Fresh Produce Protector
4 cups granulated sugar
4 cups water
ground cinnamon (I like to add about a tablespoon to the recipe)

Wash, peel, core and slice apples. Some people slice them into rings but I like to peel, core and cut into thin wedges. Treat with Fruit-Fresh to prevent apples from darkening.

Combine granulated sugar and water in a large stock pot or saucepan. Bring mixture to a full boil, stirring until the sugar dissolves. Boil for 5 minutes. Remove pan from heat. Drain apples from water and then place them into the hot syrup and let stand for 10 minutes. Bring apples and syrup to a full boil over medium to high heat. Reduce heat to a simmer and simmer for 30 minutes. Remove apples from syrup, keep hot. Return syrup to a boil.

Layer hot apples loosely into a hot canning jar. Ladle hot syrup into the jar leaving a 1/2" headspace. Wipe rim, add seal and add the band until it's fingertip tight. Place jar on the rack elevated over simmering water of the canner. Repeat until all jars are filled.

Lower the rack into the simmering water. The water needs to cover the top of the jars by at least 1" in depth. Adjust heat to medium-high and bring the water to a boil. Process the jars for 20 minutes. Turn off the heat and remove cover. Let jars sit in the hot water for an additional 5 minutes. Remove jars from the caner and place them on top of a towel on your counter to cool. After 12 hours, check to make sure all jars sealed properly.

Wednesday, September 30, 2015

Home Canning - Creamy Cinnamon Applesauce Recipe

Fall. It's my second favorite time of the year. With the Autumn season comes cooler temperatures and plenty of Fall Festivals to enjoy. Around here...you can find an apple festival going on almost every weekend during this time of the year.

Every year I like to make and can my own homemade creamy style applesauce. My family loves to snack on it and I also use it as an ingredient when baking during the wintertime. It's a great way to cut down the fat & calories in many of your homemade baked goods.

When I make and can applesauce I used the recipe from the Ball Blue Book - Guide to Preserving. I also like to use fresh from the tree Gala apples when making it. The recipe will make 6 pint jars or 3 quart jars.


Home Canning Creamy Cinnamon Applesauce Recipe

22 to 32 medium apples
Ball Fruit-Fresh Produce Protector
1 to 1 1/2 cups water
3 tbsp. lemon juice (fresh or bottled)
1 3/4 cups to 2 1/2 cups granulated sugar (optional)
2 tsp. ground cinnamon (I add this)

Prep: Wash apples and dry. Remove stem & blossom ends. Peel apples, if desired. Cut apples into quarters. Treat apples with Ball Fruit-Fresh Produce Protector to prevent darkening. (note: I use an apple peeler and corer to make this an easy process and then cut them into quarters).

Cook: Drain apple quarters. Combine apples & water in a large pot. Cover over medium heat until soft, stirring to prevent sticking. Remove from heat. (this step can also be done in a slower cooker for several hours with the temperature set at low). Puree mixture using an electric food strainer or food mill (I use my blender). Return apple pure to the pan. Stir in granulated sugar, if desired along with ground cinnamon to taste. Bring applesauce to a boil, stirring to prevent sticking and so the granulated sugar completely dissolves.. Maintain a high temperature while filling your jars.

Fill: Ladle hot applesauce into a hot jar, leaving a 1/2" headspace. Remove air bubbles and clean the jar rim. Place lid and band onto the jar until the band is fingertip tight. Place jar on the rack elevated above the water bath canner with the water simmering at about 180 degrees F. Repeat until all of your jars are filled.

Process: Lower the rack into the simmering water. Water must cover the jars by at least 1" in depth. Adjust heat to medium-high, cover the canner and bring the water to a full boil. Process pint or quart jars for 20 minutes. Turn off heat. Let jars sit in the hot water for an additional 5 minutes to begin the cooling process. After 5 minutes remove them from the canner. Place jars on a towel on your kitchen counter to allow them to cool. After 12 hours check all jars to make sure they sealed properly.

Print: You can print out this recipe by clicking on the SHARE button at the bottom of this post. You can email it to yourself or click on PRINT and immediately print it out from my blog.

Friday, September 25, 2015

Home Canning - Apple Butter Recipe

Last week I picked up 3 bushels of Gala apples at a really fabulous price. I decided to do some home canning and made some big batches of apple sauce, apple pie filling and of course....apple butter. When I make apple butter and home can it...I use the recipe from the Ball Blue Book - Guide to Preserving.

This apple butter recipe is for home canning and will make 6 half-pint or 3 pint jars.

Home Canning - Apple Butter Recipe

4 pounds of apples (12-18 apples)
2 cups of water
4 cups granulated sugar
2 tsp. ground cinnamon
1/4 tsp. cloves

Prep: Wash apples under cold running water, drain. Core and peel apples. Cut apples into quarters. (I use an apple peeler & corer that I got from Pampered Chef and it's fabulous! I had 18 apples done within 7 minutes).

Cook: Combine the apples and water together in a large saucepan (I use a medium-sized stock pot). Cook apples at a simmer until soft. Puree mixture using an electric food processor or food mill (I use my Ninja Blender). Measure 2 quarts of apple pulp; return apple pulp to the pan. Stir in the granulated sugar and spices, stirring until sugar dissolves (over medium heat). Cook at a gentle boil until the apple mixture is thick enough to mound on a spoon, stirring frequently. Remove from heat.

Fill: Ladle hot apple butter into a hot jar, leaving a 1/4" headspace and remove air bubbles. Wipe the rim of the jar clean and then add the seal and band, adjusting the band until it's finger-tip tight. Place jar on the rack elevated over simmering water in your water bath canner. Repeat until all jars are filled.

Process: Lower the rack into the simmering water. The water needs to cover the jars completely by at least 1". Adjust the heat to medium-high, cover the canner and bring water to a rolling boil. Process half-pint or pint jars for 10 minutes. Turn off heat and let the jars sit in the hot water for an additional 5 minutes. Remove jars from canner and sit them on a towel on your counter-top to cool. After 12 hours, check seals to make sure jars sealed properly.

Monday, September 21, 2015

Home Canning - Blueberry Jam Recipe

Recently I got a great deal on some large & juicy blueberries at our local fruit orchard and couldn't resist buying them. Yup, if it's a great deal...I have a hard time walking away. Anyway, I bought 5 lbs. of organic, fresh blueberries and decided to make some homemade blueberry jam.

The recipe that I used is from the Ball Blue Book - Guide to Preserving. This recipe uses no pectin. The recipe will make 6 half-pint or 3 pint jars of jam. Here's the recipe.


Home Canning - Blueberry Jam Recipe

4-5 lbs. blueberries (9 cups crushed berries)
6 cups granulated sugar

Prep: Wash berries under cold running water and then drain. I like to let mine sit in the colander for about 5 minutes to make sure all of the water drains away. Coarsely crush blueberries one layer at a time using a potato masher. You will need 9 cups of crushed berries to make this recipe.

Cook: Combine the crushed berries and granulated sugar in a large saucepan (I use a medium-sized stock pot). Bring the mixture to a slow boil, stirring until the sugar dissolves. Increase the heat to medium-high and cook rapidly to gelling point of 220 degrees F, stirring to prevent sticking. Please note, your mixture might "splat" and it will be hot so I always wear oven mitts while stirring it to prevent those "splats" from burning my hands. Remove from heat and skin off any foam that may have formed.

Fill: Ladle hot jam into hot jar, leaving a 1/4" headspace. Remove air bubbles and wipe the jar rim clean. Place the seal and band onto the jar, adjusting until it's fingertip tight. Place jar on the rack elevated over simmering water in your water bath canner. Repeat until all of your jars are filled.

Process: Lower the rack into the simmering water. The water needs to cover the jars by at least 1" in depth. Adjust heat to medium-high, cover the canner and bring the water to a full rolling boil. Process half-pint or pint jars for 15 minutes. Turn off the heat, remove cover and let the jars cool for 5 minutes while sitting down in the water. Remove jars from the canner. Lay a towel out on your counter and place the jars on top. Let them cool for 12 hours. Check to make sure all jars are sealed before putting them into your pantry for storage. Any jars that didn't seal will need to be refrigerated and used right away.