Welcome To The Shakin 'N Bakin Blog!
Welcome to my blog! I love to cook and bake for my family. I hope you enjoy the recipes, foodie reviews, foodie giveaways and cooking tips posted on my blog.
How to Print Recipes: You can print out each individual recipe featured on this blog by clicking the "share" button at the bottom of each post. It will open up to show you options, click on print and another window will open up with the recipe inside it for printing. You can also use the SHARE button to email a copy of the recipe to yourself for printing later.
Friday, October 9, 2015
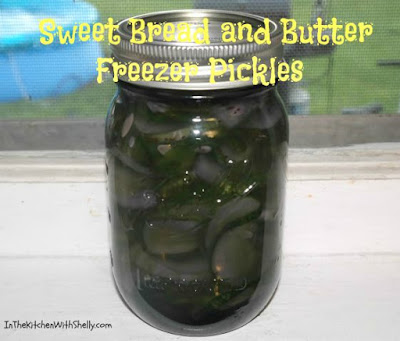
Grandma's Freezer Cucumber Pickles Recipe
One of the things that she taught me was how to make bread and butter sweet pickles. She taught me how to can them and also taught me how to freeze them. Today...I can sharing with all of you one of her super easy pickle recipes.
** Note: The reason my pickles look super dark in that glass mason jar is because I placed them in dark purple glass jars! Trust me...they look like regular pickles!
Grandma's Recipe for Cucumber Pickles
3-4 large or 6-8 small cucumbers
1 cup sweet onion, sliced or diced
1/4 cup green bell pepper, chopped
3 tbsp. pickling salt
4 cups granulated sugar
2 cups white vinegar
1 tsp. celery seed
1 tsp. ground turmeric
1 tsp. ground mustard (I use Colman's in the yellow tin)
4-6 plastic or glass freezer containers
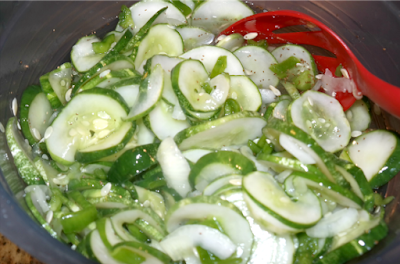
Wash the cucumbers, onion and bell pepper; dry. Slice cucumbers into slices...we like our's thin so I usually do 1/8" to 3/16" slices. Slice onion or chop it into small pieces (according to your preference and chop the green bell pepper.
In a large mixing bowl combine together the sliced cucumbers, onion, green bell pepper and pickling salt. Stir until everything is well combined. Cover the bowl and refrigerate for 4 hours, stirring every 30 minutes and re-covering the bowl.
In a large mixing bowl combine together the granulated sugar, white vinegar, celery seed, ground turmeric and ground mustard. Stir until well blended together. Cover bowl and refrigerate for 4 hours, stirring every 30 minutes and re-covering the bowl.
Pour the cucumber mixture into a colander and run tap water over the mixture to rinse off the salt and to drain away all liquid. I like to let mine set in the colander for several minutes. Pour cucumbers back into their original bowl. Slowly pour the sugar and vinegar mixture into the cucumber & pepper mixture until well combined, stirring after each addition. Let this mixture sit for 10 minutes.
Spoon pickle mixture into freezer-safe containers leaving a 1" headspace in each container. Cover. Place them into the freezer. When ready to use...thaw them in the refrigerator overnight. Once thawed, they will keep for several days in the refrigerator. Do NOT let them sit out in room temperature for hours!
Print Recipe: You can print out this recipe by clicking on the SHARE button located at the bottom of this post. A new window will open. Click on PRINT and the recipe will load into the window for fast printing. Enjoy!
Wednesday, October 7, 2015
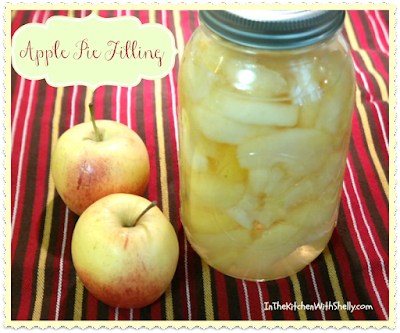
Home Canning - Apple Pie Filling Recipe
The recipe that I like to use is from the Ball Blue Book - Guide to Preserving. This recipe will yield 6 to 7 pint jars.
Home Canning - Apple Pie Filling Recipe
10 lbs. apples
Ball Fruit-Fresh Produce Protector
4 cups granulated sugar
4 cups water
ground cinnamon (I like to add about a tablespoon to the recipe)
Wash, peel, core and slice apples. Some people slice them into rings but I like to peel, core and cut into thin wedges. Treat with Fruit-Fresh to prevent apples from darkening.
Combine granulated sugar and water in a large stock pot or saucepan. Bring mixture to a full boil, stirring until the sugar dissolves. Boil for 5 minutes. Remove pan from heat. Drain apples from water and then place them into the hot syrup and let stand for 10 minutes. Bring apples and syrup to a full boil over medium to high heat. Reduce heat to a simmer and simmer for 30 minutes. Remove apples from syrup, keep hot. Return syrup to a boil.
Layer hot apples loosely into a hot canning jar. Ladle hot syrup into the jar leaving a 1/2" headspace. Wipe rim, add seal and add the band until it's fingertip tight. Place jar on the rack elevated over simmering water of the canner. Repeat until all jars are filled.
Lower the rack into the simmering water. The water needs to cover the top of the jars by at least 1" in depth. Adjust heat to medium-high and bring the water to a boil. Process the jars for 20 minutes. Turn off the heat and remove cover. Let jars sit in the hot water for an additional 5 minutes. Remove jars from the caner and place them on top of a towel on your counter to cool. After 12 hours, check to make sure all jars sealed properly.
Wednesday, September 30, 2015
Home Canning - Creamy Cinnamon Applesauce Recipe
Fall. It's my second favorite time of the year. With the Autumn season comes cooler temperatures and plenty of Fall Festivals to enjoy. Around here...you can find an apple festival going on almost every weekend during this time of the year.
Every year I like to make and can my own homemade creamy style applesauce. My family loves to snack on it and I also use it as an ingredient when baking during the wintertime. It's a great way to cut down the fat & calories in many of your homemade baked goods.
When I make and can applesauce I used the recipe from the Ball Blue Book - Guide to Preserving. I also like to use fresh from the tree Gala apples when making it. The recipe will make 6 pint jars or 3 quart jars.
22 to 32 medium apples
Ball Fruit-Fresh Produce Protector
1 to 1 1/2 cups water
3 tbsp. lemon juice (fresh or bottled)
1 3/4 cups to 2 1/2 cups granulated sugar (optional)
2 tsp. ground cinnamon (I add this)
Prep: Wash apples and dry. Remove stem & blossom ends. Peel apples, if desired. Cut apples into quarters. Treat apples with Ball Fruit-Fresh Produce Protector to prevent darkening. (note: I use an apple peeler and corer to make this an easy process and then cut them into quarters).
Cook: Drain apple quarters. Combine apples & water in a large pot. Cover over medium heat until soft, stirring to prevent sticking. Remove from heat. (this step can also be done in a slower cooker for several hours with the temperature set at low). Puree mixture using an electric food strainer or food mill (I use my blender). Return apple pure to the pan. Stir in granulated sugar, if desired along with ground cinnamon to taste. Bring applesauce to a boil, stirring to prevent sticking and so the granulated sugar completely dissolves.. Maintain a high temperature while filling your jars.
Fill: Ladle hot applesauce into a hot jar, leaving a 1/2" headspace. Remove air bubbles and clean the jar rim. Place lid and band onto the jar until the band is fingertip tight. Place jar on the rack elevated above the water bath canner with the water simmering at about 180 degrees F. Repeat until all of your jars are filled.
Process: Lower the rack into the simmering water. Water must cover the jars by at least 1" in depth. Adjust heat to medium-high, cover the canner and bring the water to a full boil. Process pint or quart jars for 20 minutes. Turn off heat. Let jars sit in the hot water for an additional 5 minutes to begin the cooling process. After 5 minutes remove them from the canner. Place jars on a towel on your kitchen counter to allow them to cool. After 12 hours check all jars to make sure they sealed properly.
Print: You can print out this recipe by clicking on the SHARE button at the bottom of this post. You can email it to yourself or click on PRINT and immediately print it out from my blog.
Friday, September 25, 2015
Home Canning - Apple Butter Recipe
This apple butter recipe is for home canning and will make 6 half-pint or 3 pint jars.
Home Canning - Apple Butter Recipe
4 pounds of apples (12-18 apples)
2 cups of water
4 cups granulated sugar
2 tsp. ground cinnamon
1/4 tsp. cloves
Prep: Wash apples under cold running water, drain. Core and peel apples. Cut apples into quarters. (I use an apple peeler & corer that I got from Pampered Chef and it's fabulous! I had 18 apples done within 7 minutes).
Cook: Combine the apples and water together in a large saucepan (I use a medium-sized stock pot). Cook apples at a simmer until soft. Puree mixture using an electric food processor or food mill (I use my Ninja Blender). Measure 2 quarts of apple pulp; return apple pulp to the pan. Stir in the granulated sugar and spices, stirring until sugar dissolves (over medium heat). Cook at a gentle boil until the apple mixture is thick enough to mound on a spoon, stirring frequently. Remove from heat.
Fill: Ladle hot apple butter into a hot jar, leaving a 1/4" headspace and remove air bubbles. Wipe the rim of the jar clean and then add the seal and band, adjusting the band until it's finger-tip tight. Place jar on the rack elevated over simmering water in your water bath canner. Repeat until all jars are filled.
Process: Lower the rack into the simmering water. The water needs to cover the jars completely by at least 1". Adjust the heat to medium-high, cover the canner and bring water to a rolling boil. Process half-pint or pint jars for 10 minutes. Turn off heat and let the jars sit in the hot water for an additional 5 minutes. Remove jars from canner and sit them on a towel on your counter-top to cool. After 12 hours, check seals to make sure jars sealed properly.
Monday, September 21, 2015
Home Canning - Blueberry Jam Recipe
Recently I got a great deal on some large & juicy blueberries at our local fruit orchard and couldn't resist buying them. Yup, if it's a great deal...I have a hard time walking away. Anyway, I bought 5 lbs. of organic, fresh blueberries and decided to make some homemade blueberry jam.
The recipe that I used is from the Ball Blue Book - Guide to Preserving. This recipe uses no pectin. The recipe will make 6 half-pint or 3 pint jars of jam. Here's the recipe.
4-5 lbs. blueberries (9 cups crushed berries)
6 cups granulated sugar
Prep: Wash berries under cold running water and then drain. I like to let mine sit in the colander for about 5 minutes to make sure all of the water drains away. Coarsely crush blueberries one layer at a time using a potato masher. You will need 9 cups of crushed berries to make this recipe.
Cook: Combine the crushed berries and granulated sugar in a large saucepan (I use a medium-sized stock pot). Bring the mixture to a slow boil, stirring until the sugar dissolves. Increase the heat to medium-high and cook rapidly to gelling point of 220 degrees F, stirring to prevent sticking. Please note, your mixture might "splat" and it will be hot so I always wear oven mitts while stirring it to prevent those "splats" from burning my hands. Remove from heat and skin off any foam that may have formed.
Fill: Ladle hot jam into hot jar, leaving a 1/4" headspace. Remove air bubbles and wipe the jar rim clean. Place the seal and band onto the jar, adjusting until it's fingertip tight. Place jar on the rack elevated over simmering water in your water bath canner. Repeat until all of your jars are filled.
Process: Lower the rack into the simmering water. The water needs to cover the jars by at least 1" in depth. Adjust heat to medium-high, cover the canner and bring the water to a full rolling boil. Process half-pint or pint jars for 15 minutes. Turn off the heat, remove cover and let the jars cool for 5 minutes while sitting down in the water. Remove jars from the canner. Lay a towel out on your counter and place the jars on top. Let them cool for 12 hours. Check to make sure all jars are sealed before putting them into your pantry for storage. Any jars that didn't seal will need to be refrigerated and used right away.
Tuesday, September 15, 2015
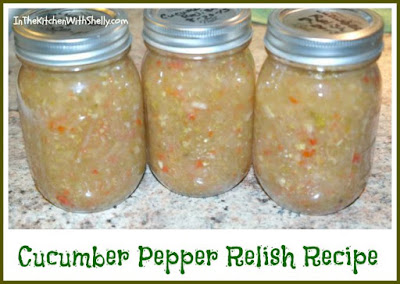
Home Canning - Cucumber Relish Recipe
When I make cucumber relish I use the recipe from the Ball Blue Book - Guide to Preserving. Here's the recipe. This recipe will yield about 6 pint jars...although most of the time I get 7 pint jars out of it.
Home Canning - Cucumber Relish Recipe
8 medium cucumbers, chopped
2 cups green bell peppers, chopped
2 cups red bell peppers, chopped
1 cup onion, finely chopped
1 tbsp. turmeric
1/2 cup Ball Salt for Pickling and Preserving
4 quarts water, divided
1 1/2 cups brown sugar
1 quart vinegar, 5% acidity
2 cinnamon sticks
1 tbsp. mustard seed
2 tsp. whole allspice
2 tsp. whole cloves
Note: instead of using mustard seed...I use 1 tbsp. dry mustard.
Prep: Wash cucumbers and green & red bell peppers under cold running water, drain. Cut ends off of each cucumber and coarsely chop into pieces (with skin's on and removing seeds as you go along). Cut off stems from peppers and remove seeds and membranes. Chop peppers into small pieces. Cut onion into finely chopped pieces. Combine all of the chopped cucumbers, bell peppers and onions in a large mixing bowl. Sprinkle the turmeric over the veggies. Combine 2 cups of cold water and salt together, stirring until the salt dissolves. Pour salted water into the bowl and stir. Cover the bowl and place into the refrigerator for 4 hours. Remove from refrigerator and drain away the liquid. Pour 2 quarts of water over vegetables, re-cover the bowl and let stand 1 hour in the refrigerator; drain. Tie whole spices in a spice bag.
Cook: Combine spice bag, sugar and vinegar in a large saucepan. Bring to a boil, stirring until sugar dissolves. Ladle hot pickling liquid over the vegetables. Cover and let stand in the refrigerator for 12 to 18 hours (I usually just do overnight). Remove from refrigerator and place in a large saucepan or stockpot. Bring mixture to a full boil and then reduce the heat to a simmer and simmer until the mixture is hot throughout.
Fill: Pack hot relish into a hot jar, leaving a 1/2" headspace. Remove air bubbles and wipe the jar rim clean. Place hot seal onto a hot jar. Add the band and adjust until it's finger-tip tight. Place jar on the rack above simmering water in your water bath canner. Repeat until all jars are filled.
Process: Lower the rack into simmering water. Water must cover jars by 1 inch. Adjust heat to medium-high. Cover your canner and bring the water to a full boil. Process pint jars for 10 minutes. Turn off the heat and remove the cover. Let the jars sit in the hot water for an additional 5 minutes. Remove jars and let them cool on the counter for 12 hours. Double check seals after they have cooled to make sure they sealed properly.
Print Recipe: You can print out this recipe by clicking on the SHARE button located at the bottom of this post. A new window will open. Click on PRINT and the recipe will load into the window for fast printing. Enjoy!
Saturday, September 12, 2015
Home Canning - Sweet Pickle Relish Recipe
When I make and can my homemade relish I like to use the Ball Canning recipe from the Ball Blue Book - Guide to Preserving. You will find it in the pickled foods section. The recipe will make 8 half-pint jars. Recipe is courtesy of Ball.
Sweet Pickle Relish Recipe
4 large cucumbers = 1 quart (chopped)
2 cups chopped onions
1 cup chopped green bell pepper
1 cup chopped red bell pepper
1/4 cup Ball Salt for Pickling & Canning
3 1/2 cups granulated sugar
1 tbsp. celery seed
1 tbsp. mustard seed
2 cups cider vinegar, 5% acidity
Prep: Wash cucumbers, green & red bell peppers under cool running water; drain. Remove stems and ends from the cucumbers. Peel onions & chop. Combine together the chopped cucumbers, onions, green & red bell peppers in a large bowl. Sprinkle the salt over the top. Pour cold water over the vegetables just to cover. Let bowl stand for 2 hours. Drain vegetables, rinse vegetables under cool water and drain again.
Cook: Combine granulated sugar, spices and vinegar in a large saucepan. Bring mixture to a simmer, add vegetables and simmer for 10 minutes.
Fill: Pack hot relish into hot jars, leaving a 1/2" headspace. Remove air bubbles, place lids on top and then the bands. Adjust bands until they are fingertip tight. Place jars on rack above the simmering water in a boiling water bath canner. Repeat until all jars are filled.
Process: Lower the rack into the simmering water so that water covers all of the jars by 1" or more. Adjust heat to medium-high, cover canner and bring the water to a rolling boil. Process half-pint jars 10 minutes. Turn off heat and remove cover. Let jars cool for 5 minutes. Remove jars from canner, do not retighten any of the bands that might of come loose. Cool jars on the counter for 12 hours. Recheck all jars to make sure they sealed properly before storing them in your pantry.
Print Recipe: You can print out this recipe by clicking on the SHARE button located at the bottom of this post. A new window will open. Click on PRINT and the recipe will load into the window for fast printing. Enjoy!
Sunday, September 6, 2015
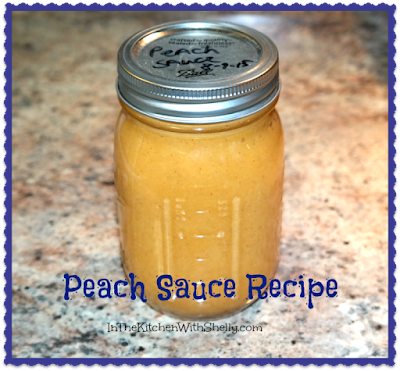
Home Canning - Homemade Peach Sauce + Recipe
Print Recipe: You can print out this recipe by clicking on the SHARE button located at the bottom of this post. A new window will open. Click on PRINT and the recipe will load into the window for fast printing. Enjoy!
Thursday, September 3, 2015
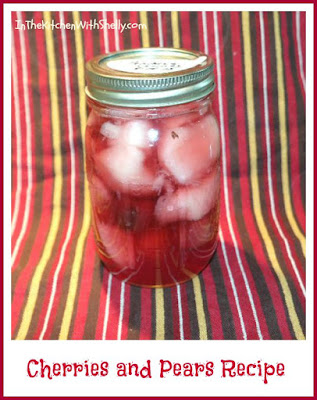
Home Canning: Cherries and Pears Mixed Fruit Recipe
Note: I don't use Fruit Fresh when making this recipe because I found that it wasn't needed to keep my pear chunks/slices looking white. However, feel free to use it if you want.
Home Canning - Cherries and Pears Mixed Fruit Recipe
3 lbs. fresh cherries
3 lbs. fresh pears
1 batch canning syrup - I use light and recipe is below
Prep: Wash fruit under cold running water, drain. Peel fruit and remove pits and/or seeds. Cut fruit into 1/2" chunks except for the cherries. I found it best to use a de-pitter tool when de-pitting the cherries. It makes quick work and keeps the cherries totally intact.
Cook: Prepare syrup (recipe below) in a large saucepan and bring to a full boil over medium to high heat. Cook fruit in syrup just until all of the fruit is hot.
Fill: Pack the hot fruit into a hot canning jar and ladle hot syrup on top...leaving 1/2" headspace at the top. Clean jar rims, add the seal and band until it's finger-tip tight. Place jar on elevated rack over simmering water in your boiling water bath canner. Repeat until all jars are filled.
Process: Lower rack into simmering water. Turn up the heat and bring water to a full boil. Make sure water covers the top of your jars by at least 1". Process your jars in boiling water (pint jars for 20 minutes and quart jars for 25 minutes). Turn off the heat and let the jars sit in the hot water for an additional 5 minutes. Remove them from the canner and let them cool. In a few hours double check all seals to make sure they sealed properly.
Light Canning Syrup Recipe
In a large saucepan combine together 5 3/4 cups of water and 1 1/2 cups granulated sugar. Heat over medium heat until all of the sugar has dissolved. Keep the syrup hot (on a low temperature) until you are ready to use it.
Print Recipe: You can print out this recipe by clicking on the SHARE button located at the bottom of this post. A new window will open. Click on PRINT and the recipe will load into the window for fast printing. Enjoy!
Saturday, August 29, 2015
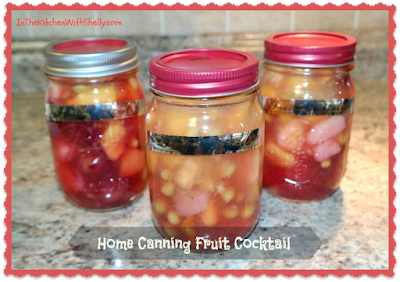
Home Canning - Fruit Cocktail Recipe
Recently I headed to the fruit orchard and got a great deal on several different fresh fruits and combined them to make a homemade fruit cocktail which I canned. Depending on the size of your fruits...this home canning recipe will make 6-8 pint jars or 4-5 quart jars.
Home Canning - Fruit Cocktail Recipe
6 to 9 lbs. fresh fruit (green seedless grapes, peaches, pears, cherries, pineapple, nectarines and yellow plums are what I use).
1 batch canning syrup - I use light and recipe is below
Prep: Wash fruit under cold running water, drain. Peel fruit and remove pits and/or seeds. Cut fruit into 1/2" chunks except for the cherries and the grapes.
Cook: Prepare syrup (recipe below) in a large saucepan and bring to a full boil over medium to high heat. Cook fruit in syrup just until all of the fruit is hot.
Fill: Pack the hot fruit into a hot canning jar and ladle hot syrup on top...leaving 1/2" headspace at the top. Clean jar rims, add the seal and band until it's finger-tip tight. Place jar on elevated rack over simmering water in your boiling water bath canner. Repeat until all jars are filled.
Process: Lower rack into simmering water. Turn up the heat and bring water to a full boil. Make sure water covers the top of your jars by at least 1". Process your jars in boiling water (pint jars for 20 minutes and quart jars for 25 minutes). Turn off the heat and let the jars sit in the hot water for an additional 5 minutes. Remove them from the canner and let them cool. In a few hours double check all seals to make sure they sealed properly.
Light Canning Syrup Recipe
In a large saucepan combine together 5 3/4 cups of water and 1 1/2 cups granulated sugar. Heat over medium heat until all of the sugar has dissolved. Keep the syrup hot (on a low temperature) until you are ready to use it.
Print Recipe: You can print out this recipe by clicking on the SHARE button located at the bottom of this post. A new window will open. Click on PRINT and the recipe will load into the window for fast printing. Enjoy!
Tuesday, August 25, 2015
Home Canning - Cucumber Sandwich Pickles Recipe
Home Canning - Cucumber Sandwich Pickles Recipe
2 lbs. 3-4" cucumbers, sliced into 1/4" slices
1/2 cup Ball Salt for Pickling & Preserving
3 quarts water, divided
1 quart plus 1 cup white vinegar 5% acidity, divided
1 cup brown sugar
1 cup granulated sugar
1/2 tsp. celery seed
1/2 tsp. mustard seed
1/2 tsp. turmeric
* When I make this recipe I substitute the mustard seed with 1/2 tsp. of Colman's Dry Mustard.
Prep: Wash cucumbers under cold water, drain. Remove stem and 1/16" from blossom ends of cucumber. Slice cucumber in 1/4" slices. Place slices in a large mixing bowl. Combine salt and 2 quarts of water, stirring until salt dissolves. Pour salted water over cucumber slices. Let stand 2 to 3 hours (I let my stand for 3 complete hours) in the refrigerator. Drain cucumber slices and rinse slices under cold water to rinse away the salt; drain again.
Cook: Combine 3 cups vinegar and 3 cups water in a large saucepan. Bring mixture to a boil. Reduce heat to a simmer. Add cucumber slices and simmer for 5 minutes. Drain, discarding the liquid. Combine 2 cups vinegar, 1 cup water, brown sugar, granulated sugar and spices in a large saucepan. Simmer mixture for 10 minutes. Add cucumber slices and bring mixture to a full boil.
Fill: Ladle hot pickles and pickling liquid into a hot jar, leaving 1/2" headspace. Remove air bubbles. Clean jar rim and place band onto jar until it's finger-tip tight. Place jar on the rack elevated over simmering water in a boiling water bath canner. Repeat until all of your jars are filled.
Process: Lower the rack into simmering water. Water must cover the jars by at least 1". Adjust heat to medium-high, cover the canner and bring the water to a full boil. Once it's boiling you want to process your pint jars for 10 minutes. Turn off the heat and let the jars sit in the hot water for an additional 5 minutes. Remove jars and let them cool on the counter. Make sure you check all of your seals after they have completely cooled to make sure they sealed properly.
Print Recipe: You can print out this recipe by clicking on the SHARE button located at the bottom of this post. A new window will open. Click on PRINT and the recipe will load into the window for fast printing. Enjoy!
Sunday, August 23, 2015
Home Canning - Peaches Recipe
Two weeks ago I got a fabulous deal on Freestone Peaches at my local orchard & farmer's market. I ended up buying a few bushels so that I could can them. When I can my peaches...I always follow the recipe in the Ball Blue Book - Guiding to Preserving. I opt to make them in light syrup and I do the Raw Pack method. The recipe will make 6 pint or 3 quart jars.
Home Canning Peaches Recipe
18 to 27 medium fresh peaches
Ball Fruit-Fresh Produce Protector
1 Batch of Light Syrup for Canning (recipe below)
Prep: Wash peaches under cold running water; drain. To peel the peaches, blanch them in boiling water for 30 to 60 seconds, transfer to cold water. Peel them and remove the pit by cutting peaches in half lengthwise. Treat with Fruit-Fresh to prevent darkening.
Cook: Prepare syrup for canning (see below) in a medium saucepan. Bring mixture to a boil. Reduce heat to a simmer. Drain peaches.
Fill: Pack peaches, cavity side down and in layers, overlapping one another into a hot canning jar. Ladle hot syrup over the peaches leaving a 1/2" headspace.
Remove air bubbles, wipe the rims clean. Apply the seal and tighten the band so that it's finger-tip tight. Place jar into the wire rack of your water bath canner that has simmering hot water in it. Continue until all jars are filled.
Process: Lower the rack into the simmering hot water. Make sure water is covering the top of the jars by at least 1". Adjust heat to medium-high, cover the canner and bring the water to a boil. Process the pint jars for 25 minutes or the quart jars for 30 minutes. Turn off the heat and let jars sit for 5 minutes in the hot water. Lift up the wire basket and remove jars to let them cool. After 12 hours make sure that all of your jars have sealed properly.
Light Syrup Recipe
2 1/4 cups of granulated sugar
5 1/4 cups of water
To make syrup mix together the granulated sugar with water in a medium saucepan over medium heat until all of the granulated sugar has dissolved.
* Each syrup batch yields enough syrup to can 3 to 4 quart jars of fruit.
Print Recipe: You can print out this recipe by clicking on the SHARE button located at the bottom of this post. A new window will open. Click on PRINT and the recipe will load into the window for fast printing. Enjoy!
Friday, August 14, 2015
Home Canning - Fresh Plums Recipe
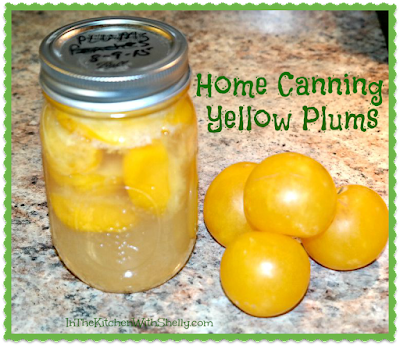 |
| Home Canning - Yellow Plums |
Recently I got a great deal on some fresh yellow plums and decided to preserve them by canning them into pint size jars. The yellow plums that I got were on the small size but absolutely delicious! When I can plums I always follow the recipe & instructions in the Ball Blue Book - Guide to Preserving. In addition, I process them using a light syrup. You will find the recipe and instructions below.
Home Canning - Fresh Plums Recipe
* This recipe will yield 6 pint or 3 quart jars. Plus can be canned whole w/the pit in them (must prick skin with sharp skewer so they don't pop during the processing) or slice them in half, leaving the skins on and just remove the pit (which is how I make them).
9 to 15 medium sized plums
1 batch of light syrup (recipe below)
Prep: Wash plums under cold water; drain. Prep the plums for processing (see my notes above).
Raw Pack: Prepare syrup (recipe below) for canning in a medium-sized saucepan. Bring mixture to a boil and then reduce heat to a simmer.
Fill: Pack plums firmly but without crushing into a hot jar. Ladle hot syrup over the plums to fill up the jar leaving a 1/2" headspace at the top.
Remove air bubbles and clean the jar rim. Center lid on the jar and adjust the band until it's finger-tip tight. Place jar on the rack elevated over simmering water in your water bath canner. Continue doing this until all of your jars are filled.
Process: Lower the rack into the simmering water. Make sure that the water level covers the top of all jars by at least 1". Lower the rack into the simmering water. Increase heat to medium-high to bring it to a boil. Process pint jars for 20 minutes or quart jars for 25 minutes. Turn off heat and let the jars sit in the hot water for 5 minutes. Remove basket from the canner and place jars on counter to cool. After 12 hours have passed, check all jars to make sure they sealed properly.
Light Syrup Recipe
2 1/4 cups of granulated sugar
5 1/4 cups of water
To make syrup mix together the granulated sugar with water in a medium saucepan over medium heat until all of the granulated sugar has dissolved.
* Each syrup batch yields enough syrup to can 3 to 4 quart jars of fruit.
Print Recipe: You can print out this recipe by clicking on the SHARE button located at the bottom of this post. A new window will open. Click on PRINT and the recipe will load into the window for fast printing. Enjoy!
Tuesday, August 11, 2015
Home Canning - Red Raspberry Jam Recipe
I picked 7 large containers of fresh berries over a 12 day period of time and froze them until I was ready to make my jam. The recipe that I like to use for making and canning red raspberry jam is from the Ball Blue Book - Guide to Preserving on page 53. Here's the recipe.
Home Canning - Raspberry Jam Recipe
* Recipe makes about 6 half-pint jars
2 1/2 quarts red raspberries
1 cup water
1/4 to 1/2 cup granulated sugar
3 tbsp. Ball Low or No Sugar Needed Pectin
Prep: Wash red raspberries under cold water; drain. Gently crush berries one layer at a time using a potato masher until you have 5 cups of crushed raspberries.
Cook: Combine crushed red raspberries, water, granulated sugar and pectin in a large saucepan, stirring to blend everything together. Bring mixture to a full boil over medium-high heat, stirring constantly; boil hard for 1 minute. Remove mixture from heat and if gel begins to form before 1-minute boil is completed, skin off foam if necessary.
Fill: Ladle hot jam into a hot jar, leaving 1/4" headspace. Remove air bubbles, clean jar rim and adjust band to finger-tip tight. Place jar on rack of the water bath canner over simmering hot water. Continue until all jars are filled.
Process: Lower the rack into the simmering water. The water must cover jars by at least 1" over the top. Adjust heat to medium-high, cover canner and bring water to a rolling boil. Process half-pint jars for 10 minutes. Turn off heat and remove cover. Let jars sit in the hot water for 5 minutes. Remove jars from the canner. Cool jars for 12 hours.
Print Recipe: You can print out this recipe by clicking on the SHARE button located at the bottom of this post. A new window will open. Click on PRINT and the recipe will load into the window for fast printing. Enjoy!
Wednesday, August 5, 2015
Home Canning - Zucchini Relish Recipe
Zucchini has been very plentiful this year. Matter of fact, We only planted 4 zucchini plants this year and every week I am getting 2-3 huge fresh ones from my garden. Sometimes I shred them up and use them to make muffins or bread. At other times...I like to make zucchini pickles or relish.
1 3/4 cups granulated sugar
Sunday, August 2, 2015
Canning Homemade Zucchini Pickles Recipe
For the past few weeks I've been using up a ton of zucchini and canning some homemade zucchini pickles and homemade zucchini relish (recipe for the relish is forthcoming). Below you will find the recipe for the zucchini pickles. Recipe will yield 6 to 7 pints of pickles.
Zucchini Pickles Recipe for Home Canning
1 quart distilled white vinegar
2 cups granulated sugar
1/2 teaspoon kosher salt
2 teaspoons celery seed
2 teaspoons ground turmeric
1 teaspoon dry mustard
5-6 fresh zucchini, unpeeled, cut into 1/4" thick spears
1-2 large onions, finely chopped
Combine together the first 6 ingredients listed in the recipe in a large stock pot. Bring mixture to a full boil. Place the zucchini spears and chopped onions in a large bowl. Pour the hot mixture over the top and let it stand for 2 hours, stirring occasionally.
In a large stock pot, bring mixture to a full boil, then simmer the mixture for 5 minutes over medium heat. Continue simmering the mixture over the heat while quickly packing 1 jar at a time with the pickles. Fill each jar to within 1/2" of the top, making sure that vinegar solution (juice) covers the vegetables. Place jars in a water bath canner and process on a low boil for 18-20 minutes. Turn off heat, lift rack to sit on the edge of the water bath canner and let the jars sit there for an additional 5-8 minutes. Remove jars and let them sit on the counter until cool. Once they are room temperature double check all jars to make sure they sealed properly. Store your new pickles in a cool, dry and dark place for up to 1 year.
Wednesday, July 29, 2015
Home Canning - Seasoned Tomato Sauce Recipe
When I make homemade seasoned tomato sauce I always follow the recipe in the Ball Blue Book - Guide to Preserving on page 33. It's the most versatile tomato sauce recipe and can be used in any recipe that calls for seasoned tomato sauce. I like using it in my meatloaf, chili, spaghetti, vegetable soups, etc. Here is their recipe that I always use when I am canning homemade tomato sauce.
* Recipe is courtesy of Ball Blue Book.
It will make about 14 pint jars or 7 quart jars of sauce.
Seasoned Tomato Sauce Recipe for Home Canning
45 lbs. tomatoes (about 125-135 medium fresh tomatoes)
6 cups chopped onions (about 5-6 large onions)
12 cloves garlic, minced
1/2 cup extra-virgin olive oil
2 tbsp. oregano
6 bay leaves
1 tbsp. ground black pepper
1 1/2 tbsp. granulated sugar
1/4 cup salt (optional)
2 tsp. crushed red pepper flakes (optional)
Ball Citric Acid or bottled lemon juice
Prep: Wash tomatoes under cold running water, drain. Remove core and blossom ends. Cut tomatoes into quarters. Peel onions, chop onions. Peel garlic and mince.
Cook: Saute onion & garlic in olive oil in a large saucepan. Add tomatoes, oregano, bay leaves, black pepper & sugar. Stir in salt and crushed red pepper. Simmer 20 minutes, stirring occasionally. Remove bay leaves. Puree tomato mixture using an electric food strainer or food mill to remove peels and seeds. Return puree to saucepan. Cook puree, uncovered over medium-high heat until puree thickens, stirring to prevent sticking. Cook until volume is reduced by one-half.
Fill: Add 1/4 teaspoon citric acid or 1 tbsp. bottled lemon juice to a hot pint jar, 1/2 tsp. citric acid or 2 tbsp. bottled lemon juice to a hot quart jar. Ladle hot sauce into jar, leaving 1/2" headspace. Remove air bubbles. Clean jar rim, center lid on jar and adjust band to finger-tip tight. Place jar on the rack elevated over simmering water (180 degrees F) in boiling water canner. Repeat until all jars are filled.
Process: Lower the rack into the simmering water. The water must cover the jars by 1". Adjust heat to medium-high, cover canner and bring water to a full boil. Process pint jars for 35 minutes or quart jars for 40 minutes. Turn off heat and remove cover. Let jars cool for 5 minutes. Remove jars from canner, do not retighten bands if loose. Cool for 12 hours. Test seals, label and store jars.
| Tribest’s Dynablend® Horsepower Plus™ Blender |
Over the next several weeks I will be featuring numerous recipes and photographs here on my blog utilizing the Tribest’s Dynablend® Horsepower Plus™ Blender so that all of you can see it in action!
Disclosure: I received the Tribest’s Dynablend® Horsepower Plus™ Blender as a complimentary product to use and review here on my foodie blog. No compensation was received. I will be featuring the blender in various recipes here on my blog. My opinion about this blender is 100% my own experience with it.
Sunday, May 17, 2015
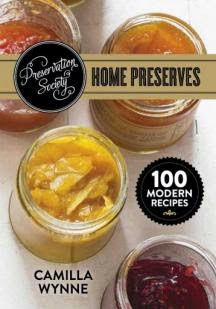
Book Review: Preservation Society Home Preserves + Giveaway
The Preservation Society Home Preserves book contains 192 pages with 60 color photographs. Whether you're a beginner or a seasoned pro, you'll be comfortable making these recipes, which feature reliable, easy-to-follow, up-to-date preserving instructions and information.
Title: The Preservation Society Home Preserves
Author: Camilla Wynne
Publisher: Robert Rose Books
ISBN: 978-0-7788-0503-8
Within the pages of this book you will find delicious recipes like:
* Fig Jam with Secrets
* Bananas Foster
* Pina Colada Jam
* Peach Passion Jam
* Bitters Blood Orange Marmalade
* White Grapefruit Marmalade
* Apricot Butter
* Apple Compote, Rhubarb-Style
* Fruit Cocktail
* Sour Cherry Lemonade Concentrate
* Heartbeets
* Pickled Brussels Sprouts
* Dilly Green Beans
* Miso Mixed Pickle
* Apple Chutney
* Jalapeno Jam
* Plus many more!!!
My grandmother taught me how to home can about 25 years ago and I've been doing it ever since. I am not a professional at it at all and basically can spaghetti sauce, tomatoes, pickles, apple sauce, pear sauce and various jams & jellies. This year though, I am going to expand my horizons!!!
The Preservation Society Home Preserves book is fantastic! It is great for the beginner and the seasoned professional canner. All of the recipes are very easy to understand and I love that the author includes various tips and variations along the way. The foodie photography in this book is mouth-watering and entices you to try your hand at making the recipe.
What I love the most about this book is that it includes all of the recipes that you basically would want to make when it comes to homemade preserves. Jams, jellies, chutney, marmalade and more! All of the things that I love to can! This book is really going to get a work-out once harvesting season comes my way later this summer and I am excited that I have it in my cookbook collection.
Giveaway: One lucky winner is going to win the Preservation Society Home Preserves book from Robert Rose. Value $24.95.
Giveaway Details: This giveaway is open to residents of the USA ONLY who are age 18 and over. Please read the Terms of Service and Disclaimer Policy before entering. This giveaway will close on June 6th, 2015 at midnight EST time.
Disclaimer: Shelly H. has personally reviewed the product listed above. Shelly has not received any monetary compensation for her review. Shelly did receive a free product to try out so she could evaluate and use it for her review. Her thoughts & opinions in this review are unbiased & honest and your opinions may differ. The Shakin N Bakin Blog is not responsible for delivery/shipping of giveaway items won from this blog nor are we responsible for mis-use or injury caused by items won from this Blog. Content on this blog is copyrighted, all rights reserved. We reserve the right to legally pursue anyone who violates our rights and/or steals our copyrighted material.
Posted by
ShellyH
at
5:30 AM
93
comments
![]()
Labels: Canning Recipes, Condiments and Sauces, Product Reviews
Saturday, February 21, 2015
Home Canning - Southern Style Pickles + Recipe
After visiting the famous Katz Deli in NYC and devouring one of their pricy pickles, Chef Shane also known as the “ Southeast’s Julia Child with Tattoos” came home to nail down a even better recipe. Below please find a pickle recipe you will relish from Ocean Catering's Chef Shane.
**The below recipe will fill up 12 quart mason jars**
Approx. 40 Pickling Cucumbers cut in spears and soaked in water over night
1 Gallon water
6 cups cider vinegar
6 cups white vinegar
1 cup pickling salt
1/2 cup sugar
3 yellow onions chunked
36 cloves fresh garlic
12 bay leaves
1/4 cup mustard seed
1/2 cup black peppercorns
24 south Indian round chili
1 lb. fresh dill
Bring water, vinegar's, salt and sugar to a boil to dissolve. Let cool. Wash Mason jars in dish washer (or by hand) and let dry. Layer spices and garnish in mason jars. Strain water from cucumbers and place in bucket. Pour hot liquid over cucumbers leaving an 1/4 inch of space at top of jar. Cover with lid and tighten band.
Line large stock pot with mason jars. Fill with water until over the top of jars and bring to a boil. Let boil for 8-10 minutes and turn off heat. The jars should come down to room temperature naturally. Remove jars from water and let cool. Wait for 2-3 weeks and enjoy. Pickles can be stored unrefrigerated on pantry shelf until opened.
Thursday, November 13, 2014
Raspberry Green Tomato Freezer Jam Recipe
Now that our gardening season is coming to an end...I have been really busy making up fresh batches of raspberry green tomato freezer jam for my family. I typically get 7 to 10 half-cup servings every time I make a batch. It will depend on the size of your tomatoes of course! Here is grandma's recipe.
Raspberry Green Tomato Freezer Jam Recipe
5 to 6 cups chopped green tomatoes
boiling water
3 cups granulated sugar
2 boxes red raspberry gelatin mix
Wash and chop up your fresh green tomatoes. I normally use 7 to 10 large green tomatoes which gets me 5 to 6 cups of chopped green tomatoes. Toss them into a pan with hot water, just enough water to cover them. Bring to a boil, stir in the granulated sugar and reduce heat. Simmer mixture on low for 15 to 20 minutes. It is done when everything is soft and squishy. Use a potato masher to mash up the pulp as it cooks...unless you like it chunky. Also, I fish out any tomato skins that float to the top as it cooks down.
Stir in the raspberry gelatin mix until all ingredients are well combined. Simmer over low heat for an additional five minutes. Turn off heat and let mixture sit in the pan for 5 to 8 minutes and then spoon it into freezer-safe containers. Label and freeze. They will keep for up to 1 year.
Posted by
ShellyH
at
6:00 AM
1 comments
![]()
Labels: Canning Recipes, Condiments and Sauces, Freezer Meals and Food


